Fitting it all on one piece of wood, part 1

Uncategorized

Two posts in one day! Making up for lost time, I suppose.

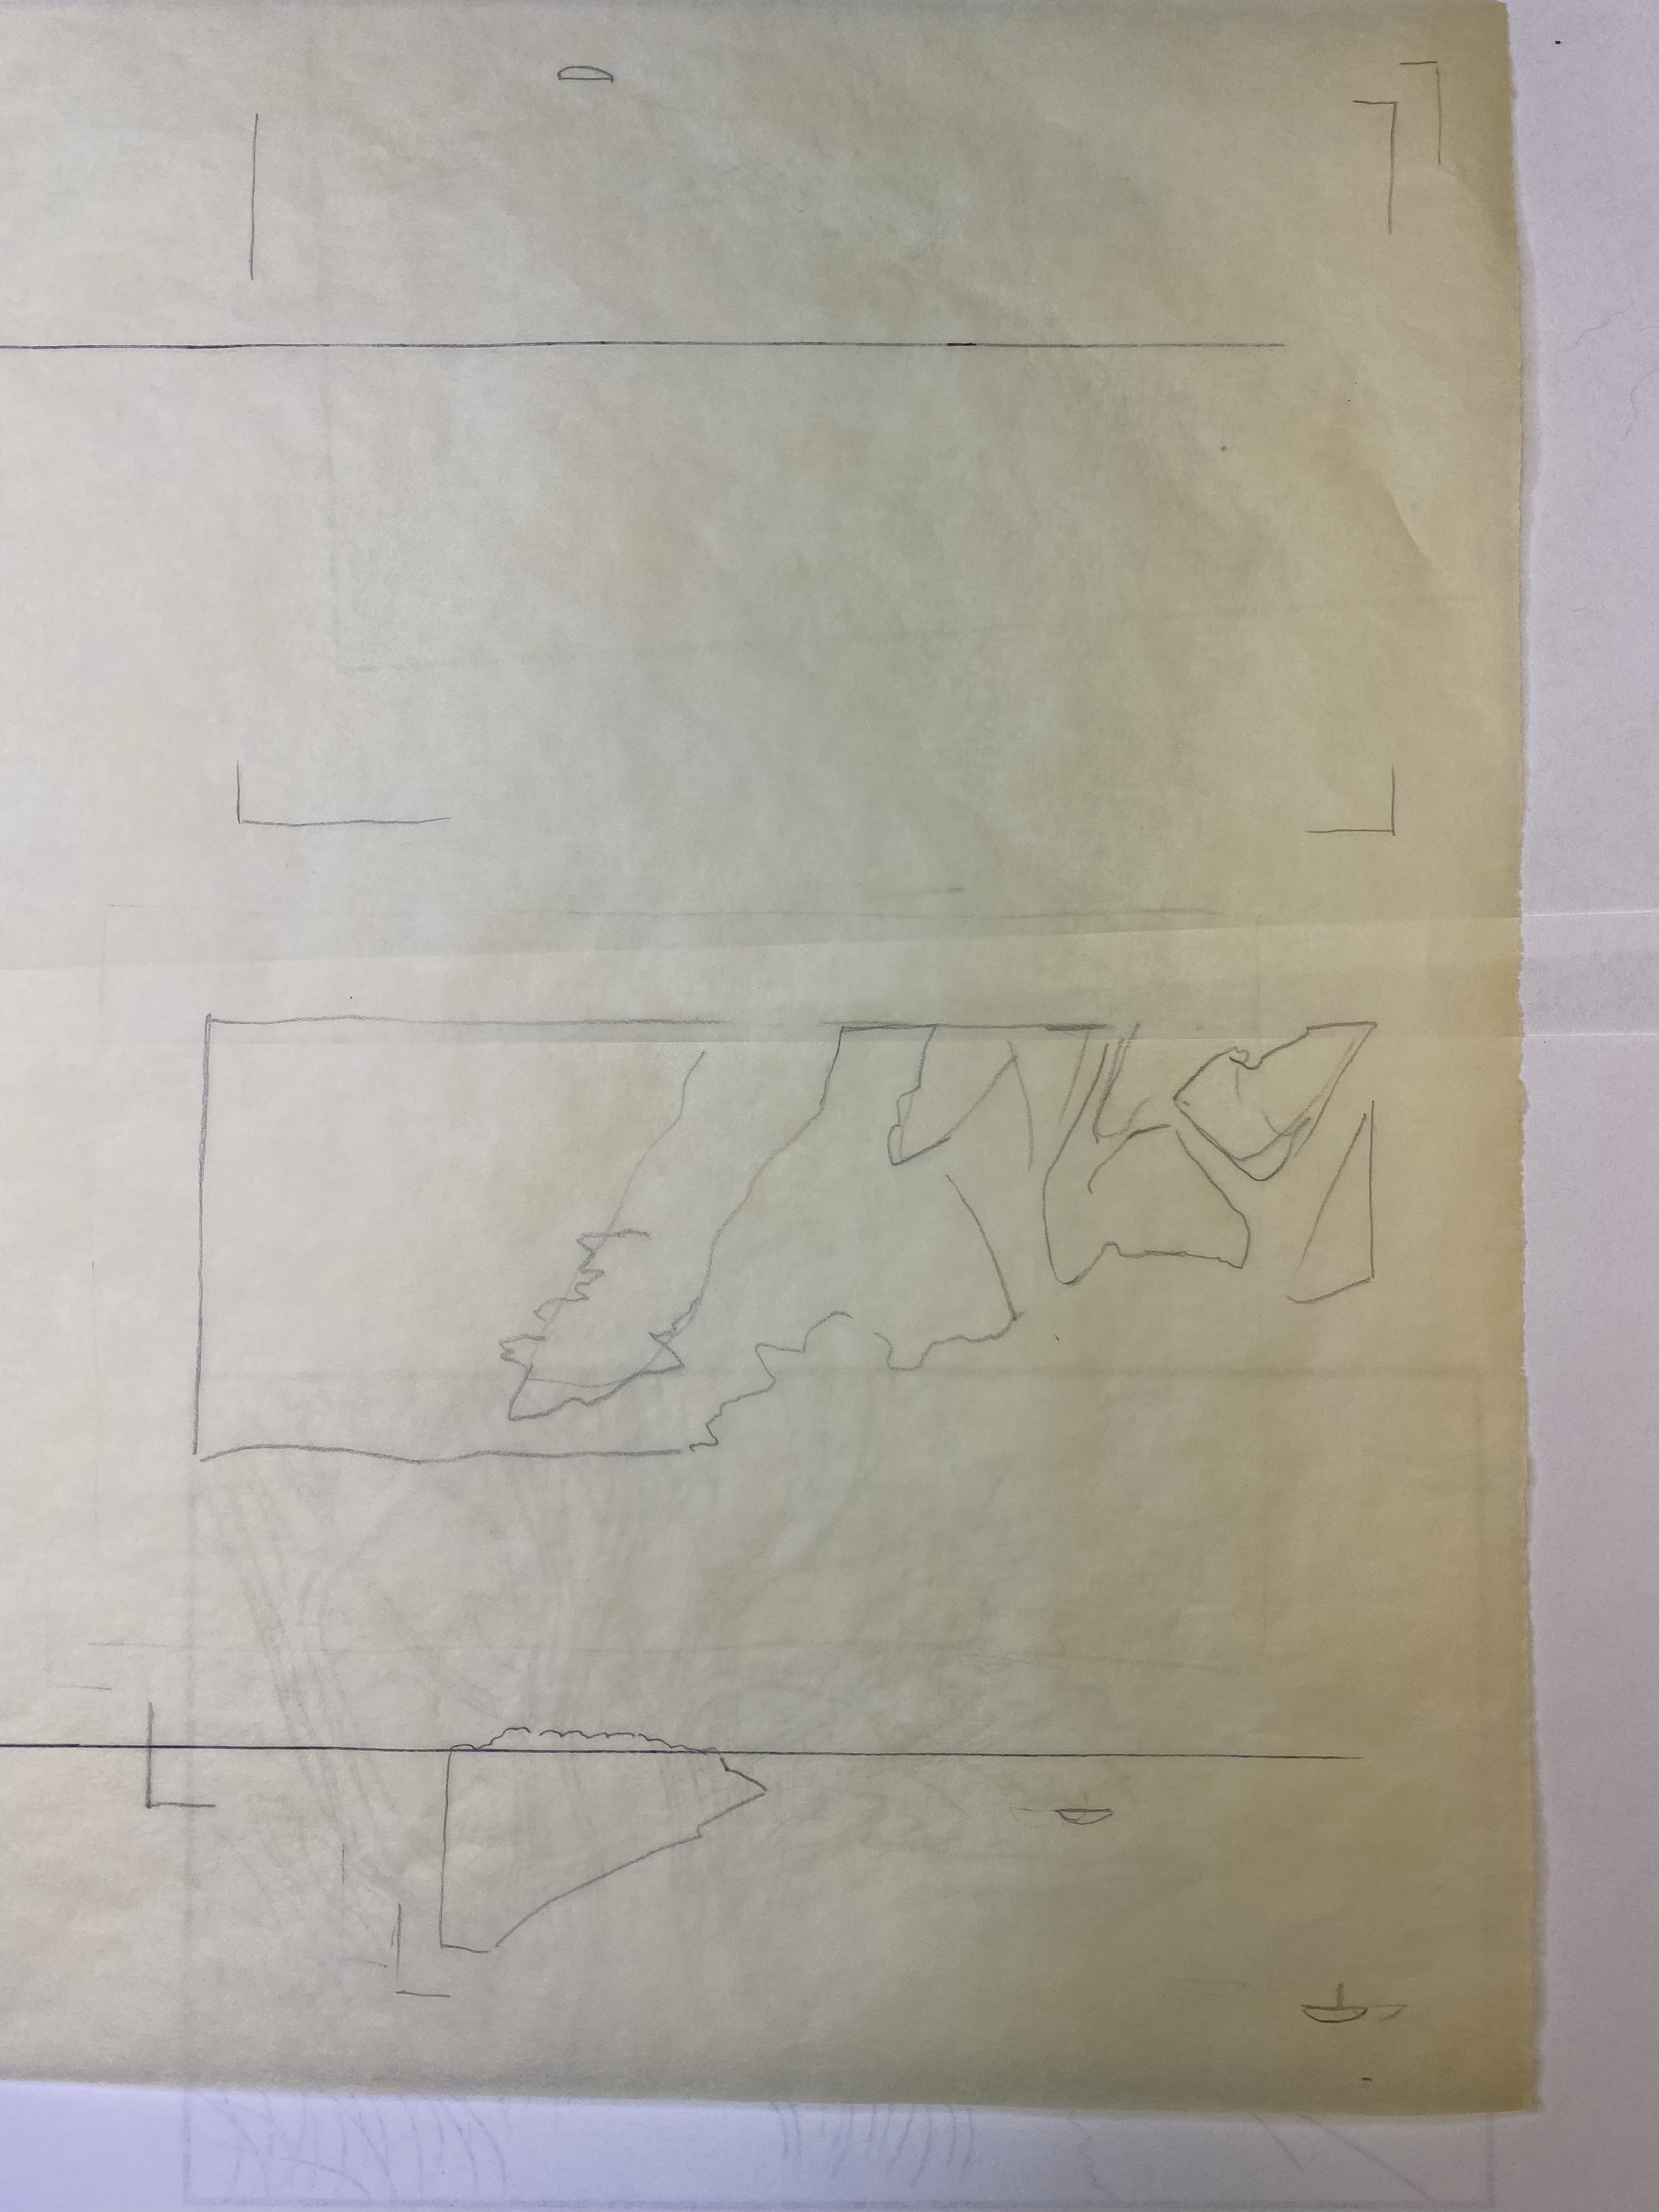
Here, I’ve got all my color block areas lined up. First, I am working on the sky, which takes up most of the left picture. If you look carefully, you will see the little area in the lower left is labeled “different block” – indeed, I need to preserve it, for use on another block. So before I pasted down the sky block sheet, I taped some plain paper on the sheet itself to mask the parts of the transfer I don’t want to mess up (middle picture). After pasting down, I used the knife to separate the part I want to preserve – and there we go, I have my little “different block” piece, unscathed, to paste down someplace else.

In the views above, the part lined by blue tape are the key lines. I have taped down a protective sheet that will stay there while I carve the color blocks.

Moving on to the other side of the wood! There are two flaws in the wood that I wanted to make sure to avoid. When planning out where the color block pieces would go, I used tracing paper to make sure they would fit on my wood. I used this piece again to verify that the placement I had planned would still be missing the flaws.

For the next transfer, I didn’t have anything I needed to preserve on the transfer sheet, but I wanted to avoid getting glue all over the block since other pieces will get pasted there.

I just taped some paper to the block so I would only get glue where it was needed. I was able to peel up the unneeded part of the transfer, with clean wood underneath.

That’s it for today! One note to end this post: we are moving into the warmer parts of the year, gradually, as evidenced by the Cat Thermometer 😉

Is cat ded?
Nope! cat is not ded.

Almost ready to test it out

Uncategorized

I’ve left the grass until the last; it’s kind of complicated with all the overlapping and intersecting lines. It’s just my luck that the gampi didn’t stick as strongly in this corner, so I am having to be very careful about dragging the knife.

Still, I am seeing the light at the end of the tunnel! Only a few more hours, then I can clear the large waste and try it out.

Another block

Uncategorized

Another block? What’s going on?

Nope, not adding a block to the forest rays print! The truth is, I just don’t have the time to start printing that one. I need several continuous days without many other responsibilities; I think I will need to take vacation to do the printing. Carving, however, is something I can spend a couple of hours on here and there. Plus I really love carving! So, motivated by that excitement and a new design idea, I’ve prepared another block. I’ve used a card scraper to smooth the surface – it yields the same kind of surface that can be achieved with a hand plane, but is a lot less expensive and requires less skill to use.

Since the last design was so complicated, for this one, I am aiming for simple simple simple. All the impressions will fit on ONE piece of wood (with two laminated cherry faces). I’m thinking monochrome too!

I got everything ready before starting the carving. I figured out the final size, cut the paper, and planned out where on the wood each impression will go.

A few of the sheets of washi have some flaws. One has a tiny blood stain because I trimmed off the very tip of my thumb cutting them 😦 and others had some bends in the paper. I’ll print them all – the sheets with slight bends might turn out fine after being dampened and printed. The sheets with (possible) flaws got a little line as a corner mark; the others got a dot on the corner that is the squarest, which will go into the corner kento when it’s time to print. 50 sheets in all! My biggest print run yet.

Now to paste down that hanshita and take a knife to the block!

Color block modification

Forest Rays

In the last post, I talked about removing the leaves that should be sunlit from the base color block, so that I could use it for a blue sky without having the sunlit leaves go dull. I decided also to remove the trunks and limbs of the trees from that block, so I could have more control over their final color. Here’s the plan:

Wow, gluing this transfer down onto an already carved block was a bit of a mess. Glue collected in the depressions and refused to spread where I wanted it. I ended up with a really rough paste job and no good peel at all, as you see on the left. But the registration seems to be good at least – it is lining up with the previously carved areas!

The one on the right is after the new areas have been carved and cleared. I had to be very thorough in washing it, and in scraping out the excess transfer glue with a toothpick.

Next, I’ll need to verify the registration of the new carving, but after that NO EXCUSES, time to start printing on real paper.

Still in the forest!

Forest Rays

Well, I am on round 3 of test printing for the forest rays. I’ll mention a few highlights here.

I got the shadow blocks carved! Here they are, still with the hanshita remnants, and after cleaning them off below.

And I tested those shadows!

There were more test prints; above I show one example of the first two testing rounds. In the first, I used a creamy yellow as the base color for almost all but the road. This worked out well for the ground and the foreground leaves that are caught in sunlight, but the yellow as sky just doesn’t work. In the second, I used a blue base color, but I think that didn’t work out as well for the ground.

Next attempt involved using a couple of gradients on the base color; the left-hand image is early in the test printing process after using a creamy yellow gradient up, and a blue gradient down, plus the light gray on the road and rocks. The righthand image has all the impressions except for the key lines, going at top speed and not trying particularly hard to get an even impression – just trying to quickly get an understanding of how this approach might affect the final colors.

I like the way I was able to recapture some of the intensity and tonal variation in the ground while keeping the blue sky, but the sunlit leaves on the left really suffer. I think I will need to alter the base color block to carve away the sunlit leaves. Alternatively, or maybe in addition, I might isolate the bright green leaves on their own block (they are currently part of the next under-layer) so I can intensify them without affecting the rest.

Back to the forest

Uncategorized

Now that Floating (to the left!) is done, it’s time to get back to what I was working on before. My idea was for a path through trees, dappled with light, with sunbeams filtering through the leaves. I wasn’t sure how to accomplish the sunbeams, so in a sense, the work on Floating let me test out an idea. I think it turned out as I expected, so It’s given me the courage to move ahead!

I haven’t posted this snapshot yet because it’s really sloppy, but this is about as far as I got with test printing. Mainly the aim was to test out some colors to see what works. I will probably make some more test prints; I think the bluish green is too blue, and I have since removed the hard line between the ground and the background foliage from the key block, hoping to make that a mistier transition.

It seems like a pretty complicated project so far. Here’s the stack of blocks; one is empty on the back so that’s 9 faces, and I think the test prints have about 15 impressions looking back on my notes.

I’ll give a sense of sunbeams by overlaying shadows that intersect and darken.

Originally, I thought the shadow blocks would be really straighforward, without much detail, and had planned to carve them on shina plywood. However, after making the transfer sheets and seeing the size and shape of some of the areas that need to be preserved, it’s pretty obvious they need to go on cherry. So, today I will make one more block! Because that one little bit of shadow on the upper left goes all the way to the top, neither one will fit on the blank face I’ve got — it’s a tiny bit too short.