Fitting it all on one block – again!

Uncategorized

My next project is now just about ready for test printing. I have a backlog of pictures to show various bits of the preparation.

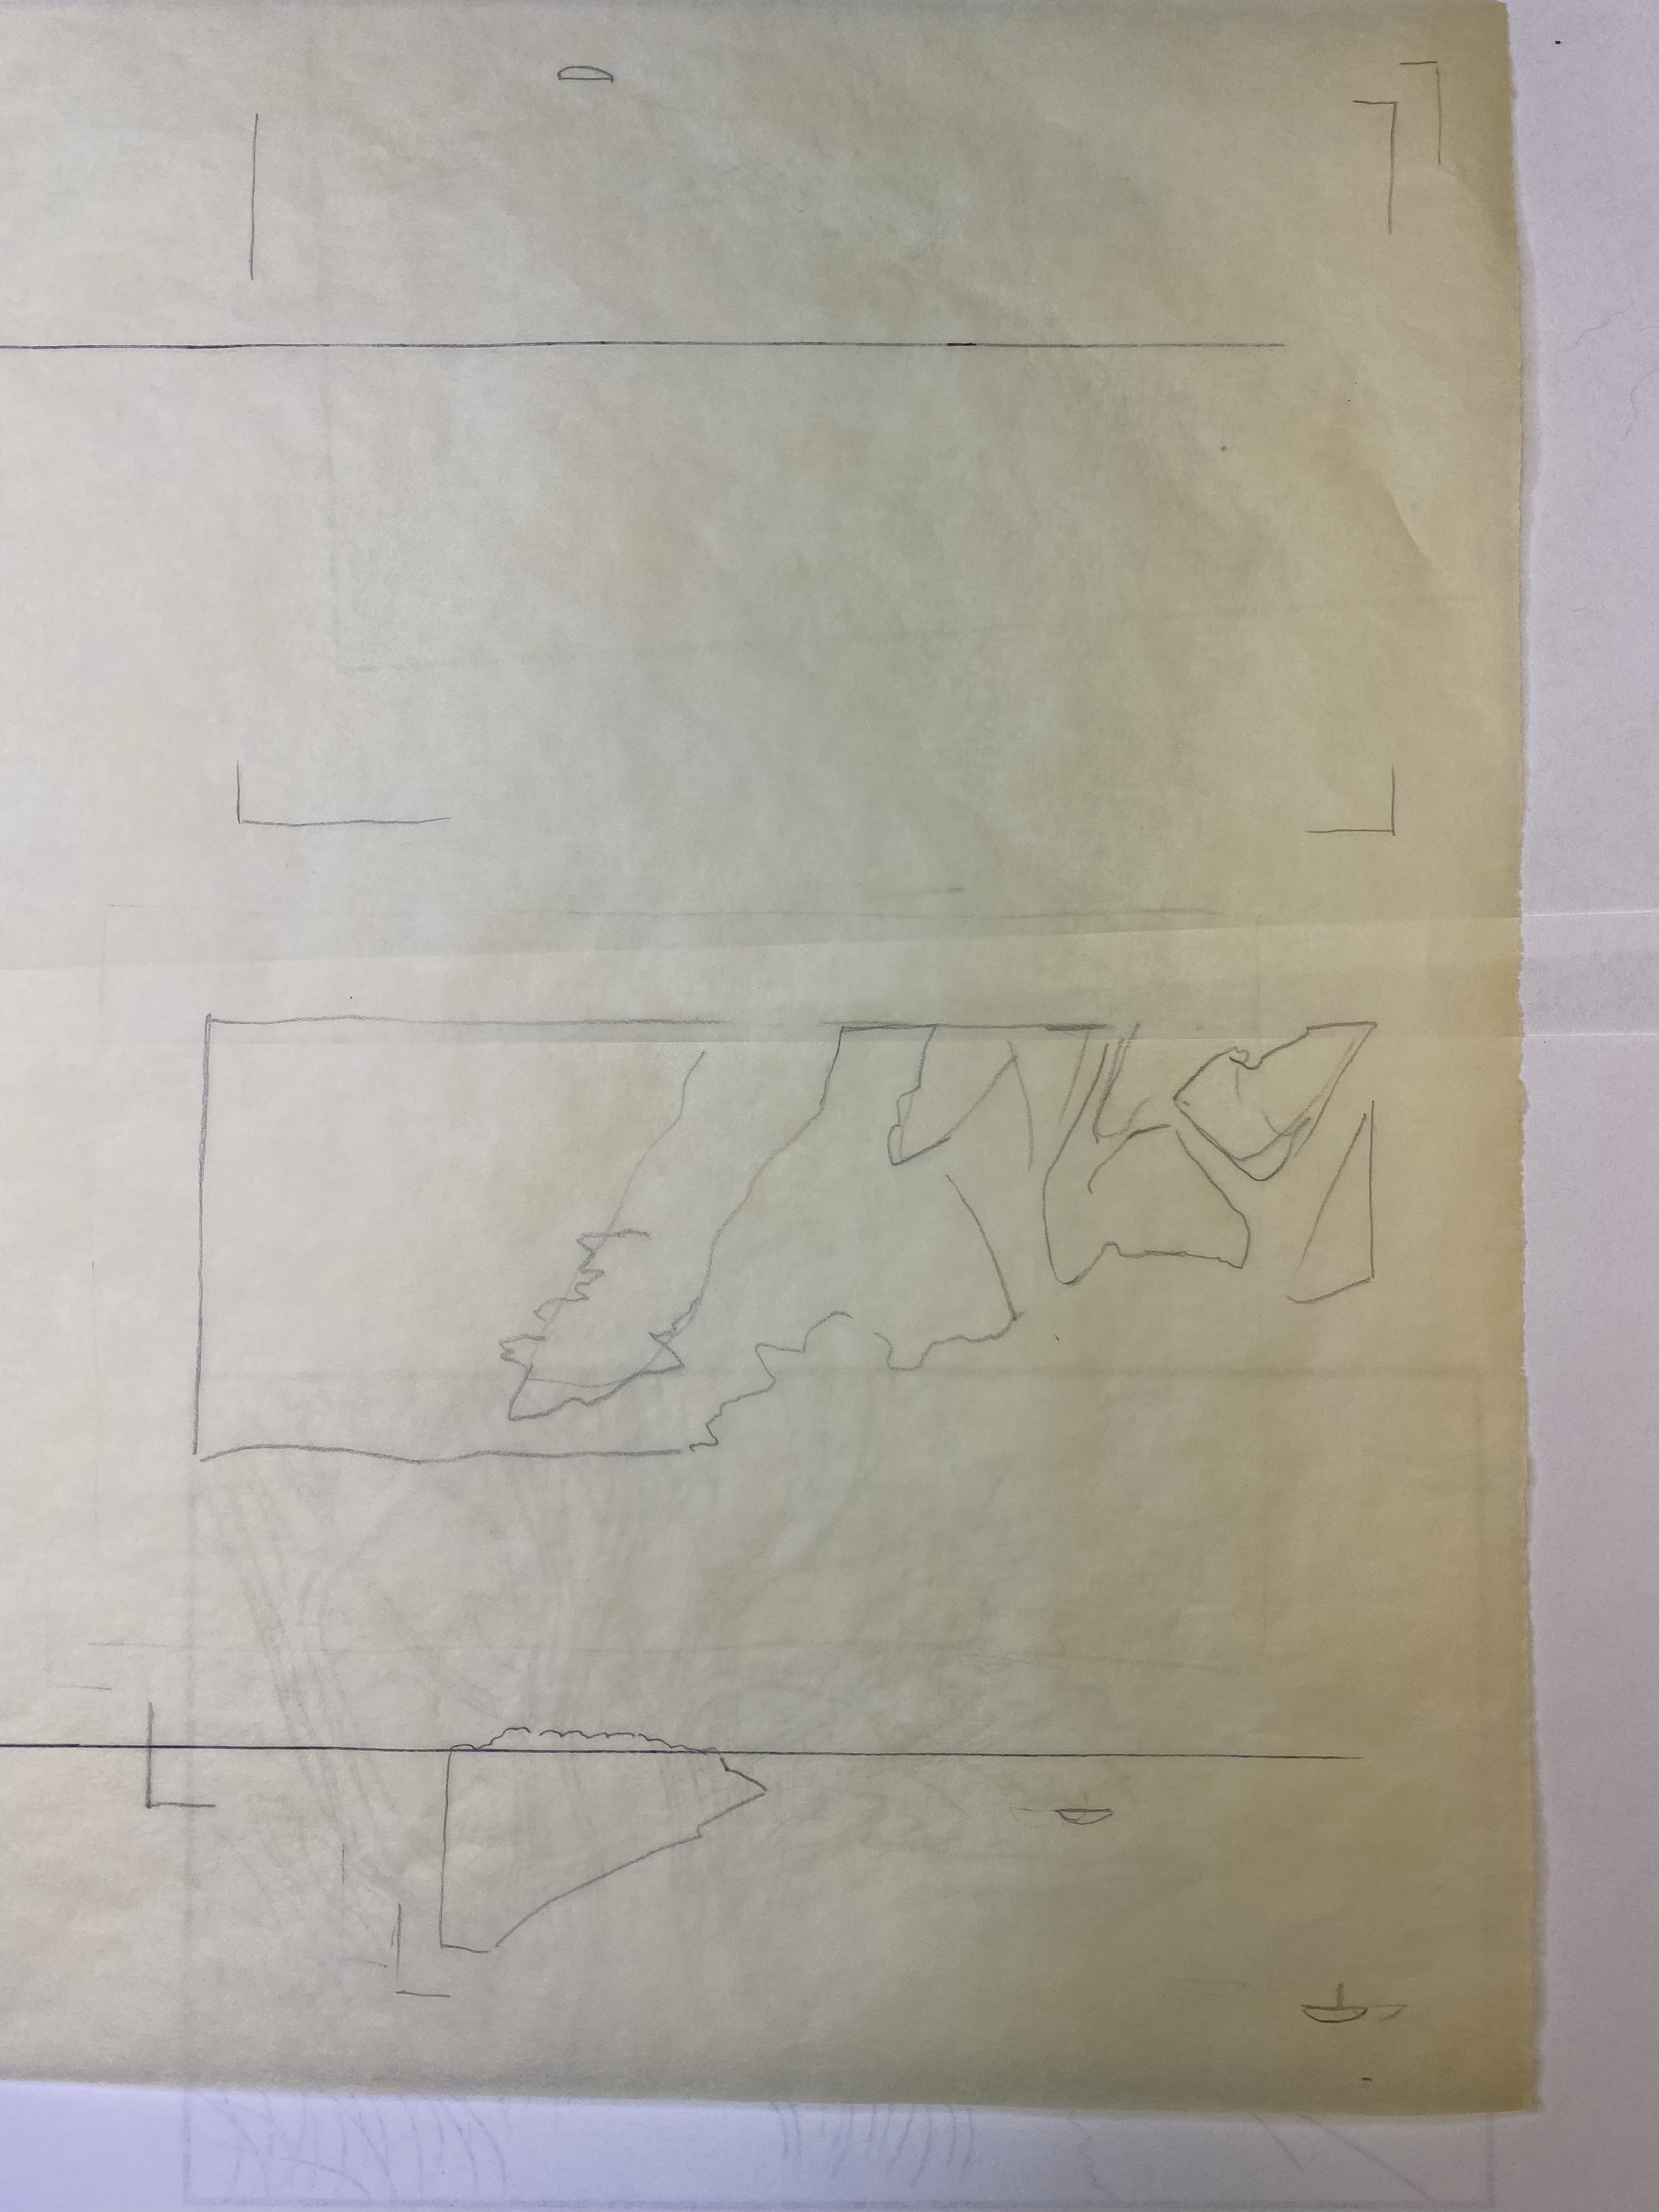
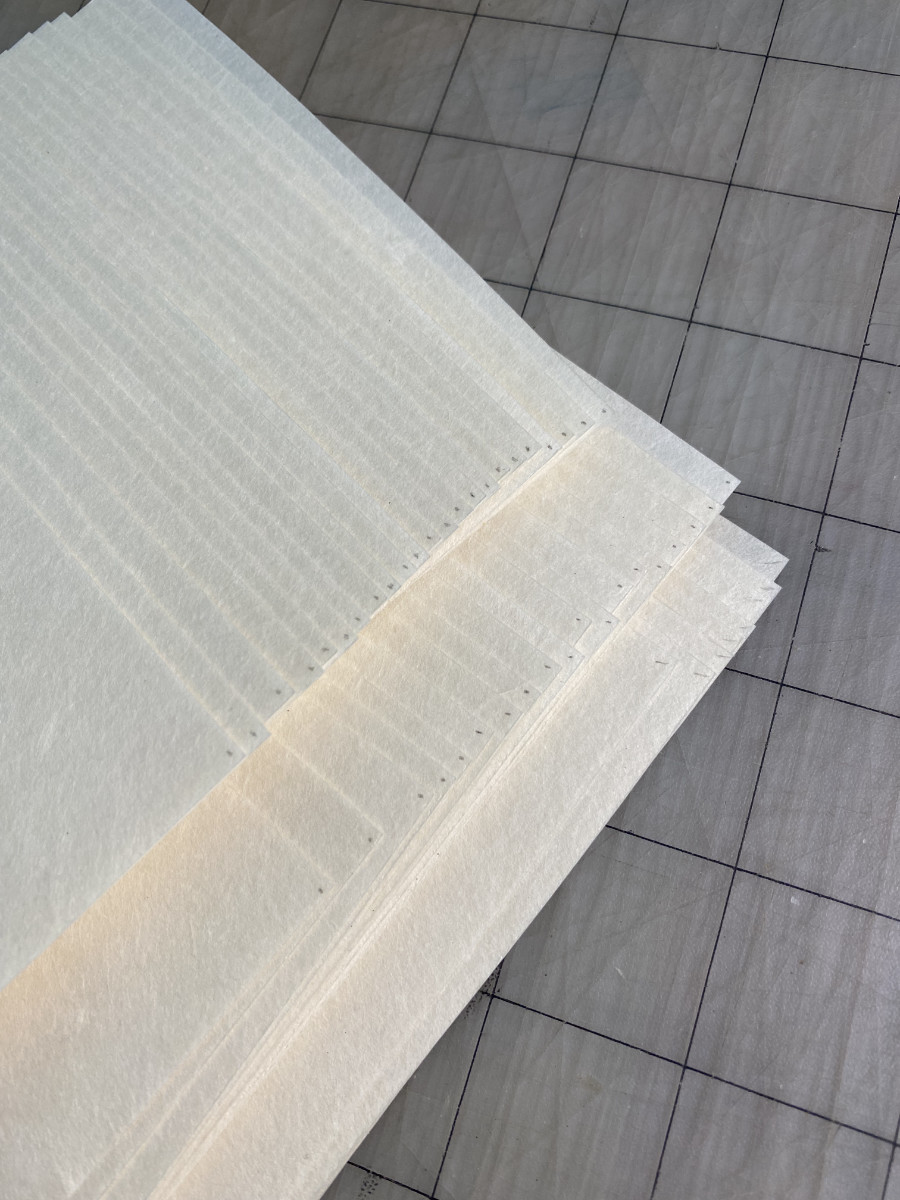
I wanted to use a whole sheet of the Kitaro Kizuki without wasting any of it. This drove the paper size, which turned out to be 6-1/4″ x 8-3/4″ (about 160 x 220mm).

This will be a print without key lines. At first I thought I could use shina, but when I worked up the design (which will take 7 color regions), I realized that to get the shapes I wanted, shina would be risky – the top plies might come off of the smaller regions. So cherry it is; time to make a new block!

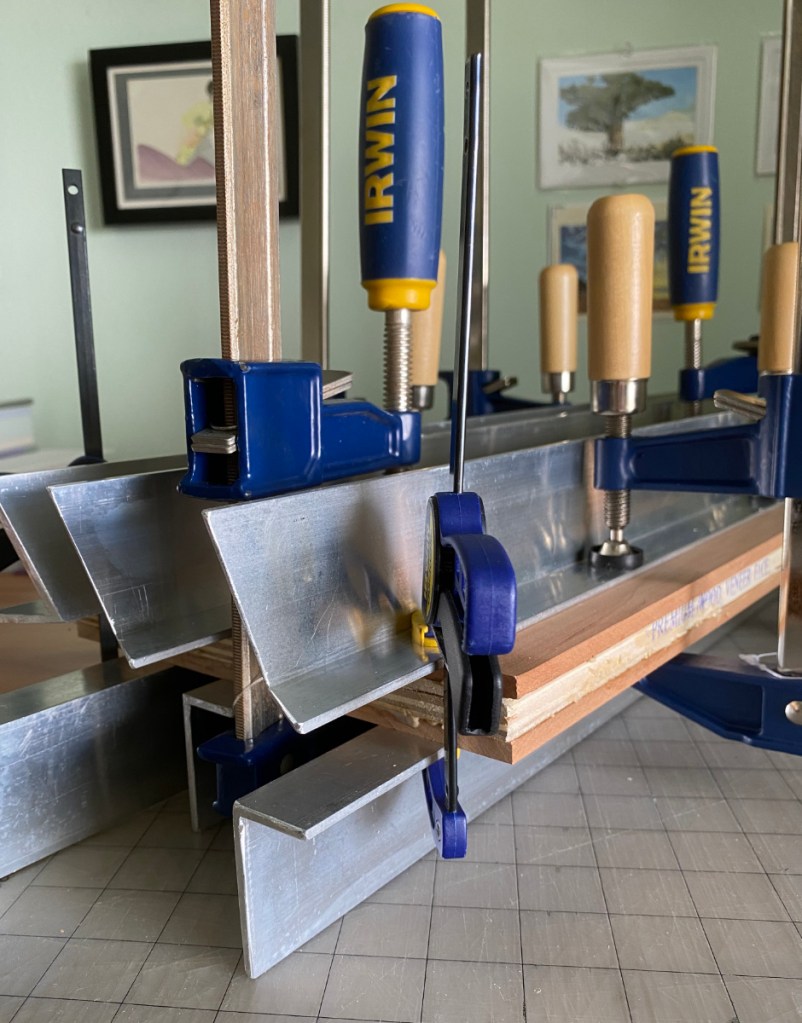
I cleaned up some aluminum scraps I found to help flatten the glue-up, scrubbing them with soap and water, filing the sharp edges, and checking to make sure there are no nicks or burrs that could damage the surface of the wood.

As usual, I used a card scraper to smooth the surface. I also wet-sanded with 1500 grit and made a final pass with the scraper.

So yes, as you might be wondering, that is a really long block! If I had made 2 double-sided blocks, I would not be able to fit all the color areas; by leaving it in one piece (8″ x 18″), I had more flexibility to position the registration marks and color areas so they would not interfere with each other.

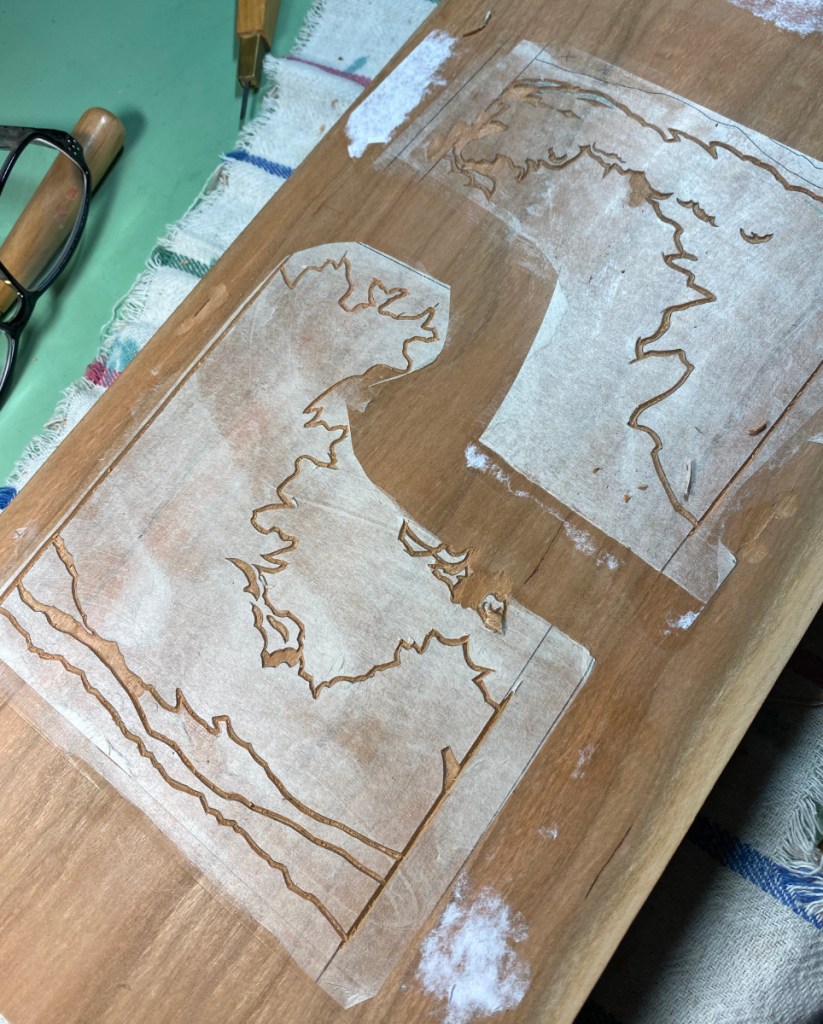
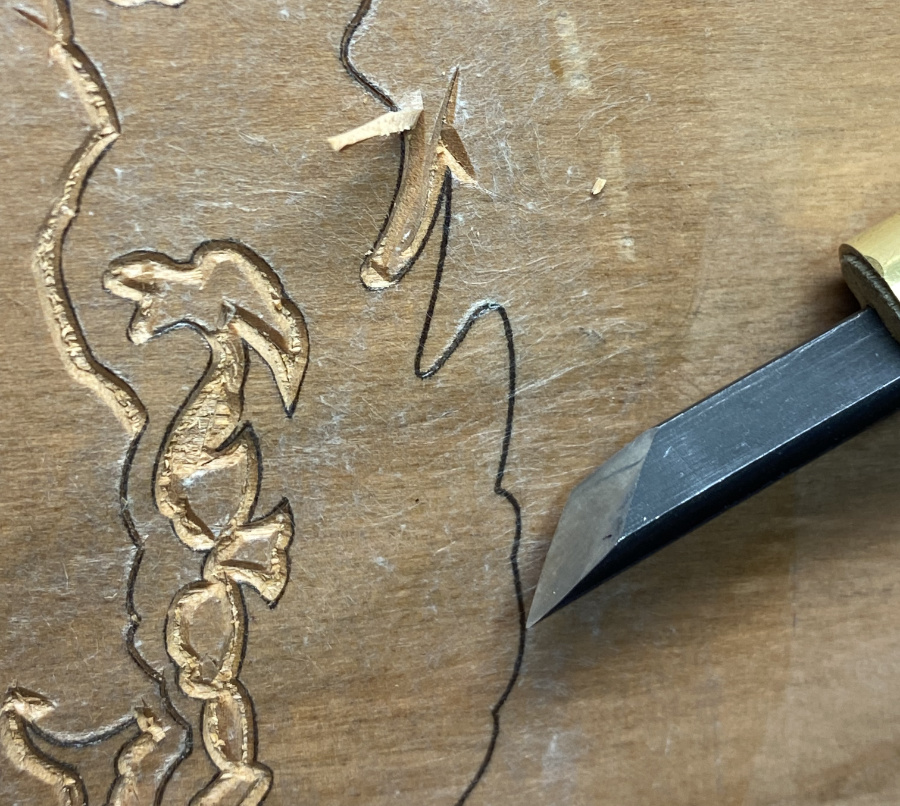
Some carving progress:

Below are some straight shots showing the full blocks, with registration marks circled.

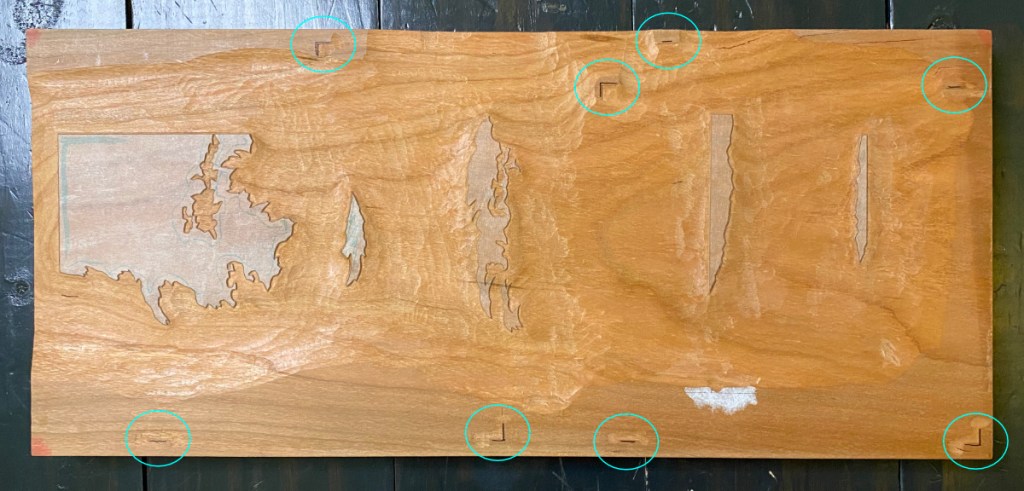
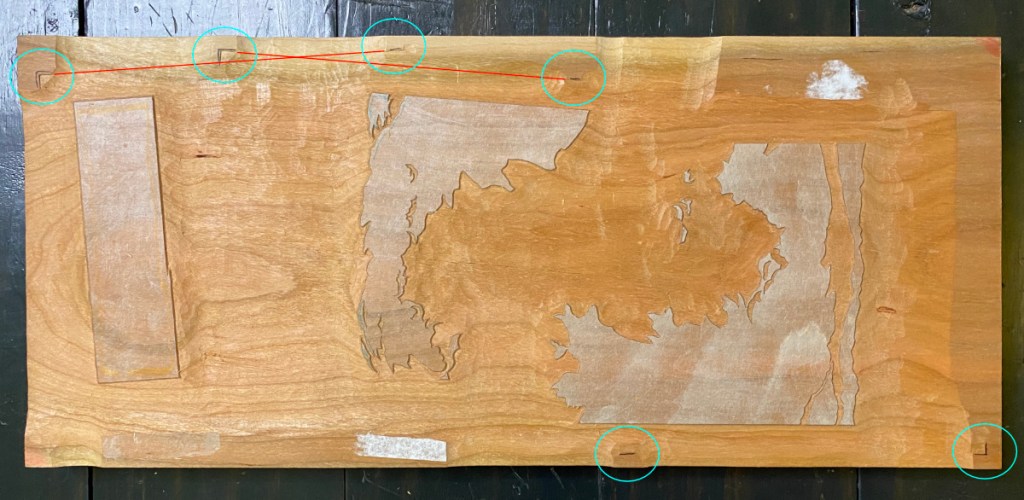
I tried to place the registration marks so that there would not be some weird bump in the middle of the paper that would result in unwanted embossing. The second mark in the top image IS in the middle of the paper for the shape that is approximately in the middle, but I think it is far enough away that I can avoid rubbing it. In the bottom image, two of the shapes are at a little bit of an angle. This places the potentially-interfering registration marks outside the edge of the paper (red lines).

Below are the cleared blocks tilted so they are lit at a low angle. This really emphasizes the texture, but it also shows that I am trying to carve deeply enough from the beginning so that I’m not doing so much cleanup when I get into printing.

That is it for now! Onward to the test-printing!

Another block

Uncategorized

Another block? What’s going on?

Nope, not adding a block to the forest rays print! The truth is, I just don’t have the time to start printing that one. I need several continuous days without many other responsibilities; I think I will need to take vacation to do the printing. Carving, however, is something I can spend a couple of hours on here and there. Plus I really love carving! So, motivated by that excitement and a new design idea, I’ve prepared another block. I’ve used a card scraper to smooth the surface – it yields the same kind of surface that can be achieved with a hand plane, but is a lot less expensive and requires less skill to use.

Since the last design was so complicated, for this one, I am aiming for simple simple simple. All the impressions will fit on ONE piece of wood (with two laminated cherry faces). I’m thinking monochrome too!

I got everything ready before starting the carving. I figured out the final size, cut the paper, and planned out where on the wood each impression will go.

A few of the sheets of washi have some flaws. One has a tiny blood stain because I trimmed off the very tip of my thumb cutting them 😦 and others had some bends in the paper. I’ll print them all – the sheets with slight bends might turn out fine after being dampened and printed. The sheets with (possible) flaws got a little line as a corner mark; the others got a dot on the corner that is the squarest, which will go into the corner kento when it’s time to print. 50 sheets in all! My biggest print run yet.

Now to paste down that hanshita and take a knife to the block!

Next project

Uncategorized

I’ll let you in on a secret – the first run of this print is already finished! I can’t show it here though, because I want it to be a surprise to some folks who will be getting it as a holiday gift. But I’ll show a bit of the preparation process.

It’s going to be a small print. You might remember seeing my post about the “frankenblocks“. I only used one face of those 3 blocks for the leaf print, so I decided to use the rest for this one. Because one of the faces already had the lines for the leaf print (Finally Fall), I protected it by taping a piece of paper over that face. You might see the tape on the bottom of the rightmost block in the picture on the left. I made another pass over the remaining faces with a thin scraper, taking care to also scrape down the little pieces I glued on to make an external kento (set of registration notches). If those pieces stick out more than the rest of the block, then the parts of the block adjacent to them will print faintly, which would be maddening!

I made up a handful of transfer sheets. These are gampi paper laminated with reposition-able spray adhesive onto card stock. (Card stock is not the best backing paper to use if you plan to woodblock-print key lines on it (which I eventually will do), because it changes size quite a bit when hit with moisture. It’s what I have, though, so it will have to do.) Laminated with a thicker paper, one of these will go through a printer just fine! If you look closely, you can see the pencil lines I marked to position the gampi. The design for the key lines was drawn by hand with a brush-pen, then scanned so I could clean it up, make the blacks black and whites white, and size it precisely to fit on the blocks. After a few test prints I could be confident where the printer would place the image on the page, hence the pencil marks.

The rest of the transfer sheets will get used eventually, to transfer the lines of the key block to other blocks that will print regions of color. To do that, I will use the carved key block, so I will need to trim the transfer sheets so that one corner and edge fits into the registration marks.