Back to the forest

Uncategorized

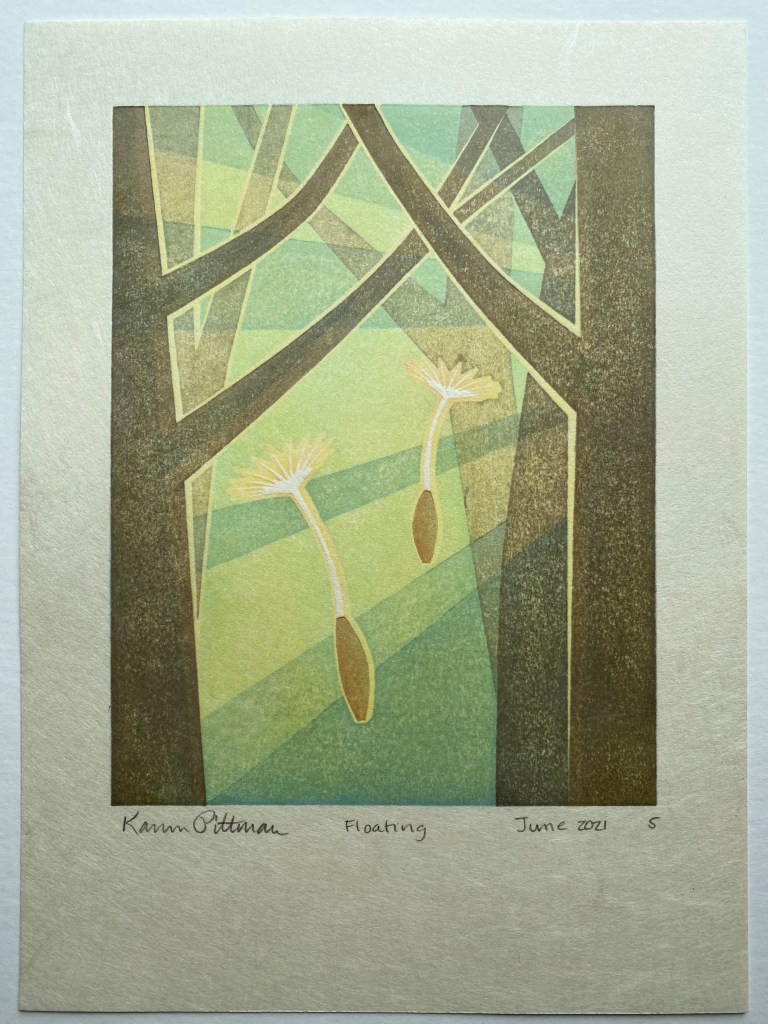
Now that Floating (to the left!) is done, it’s time to get back to what I was working on before. My idea was for a path through trees, dappled with light, with sunbeams filtering through the leaves. I wasn’t sure how to accomplish the sunbeams, so in a sense, the work on Floating let me test out an idea. I think it turned out as I expected, so It’s given me the courage to move ahead!

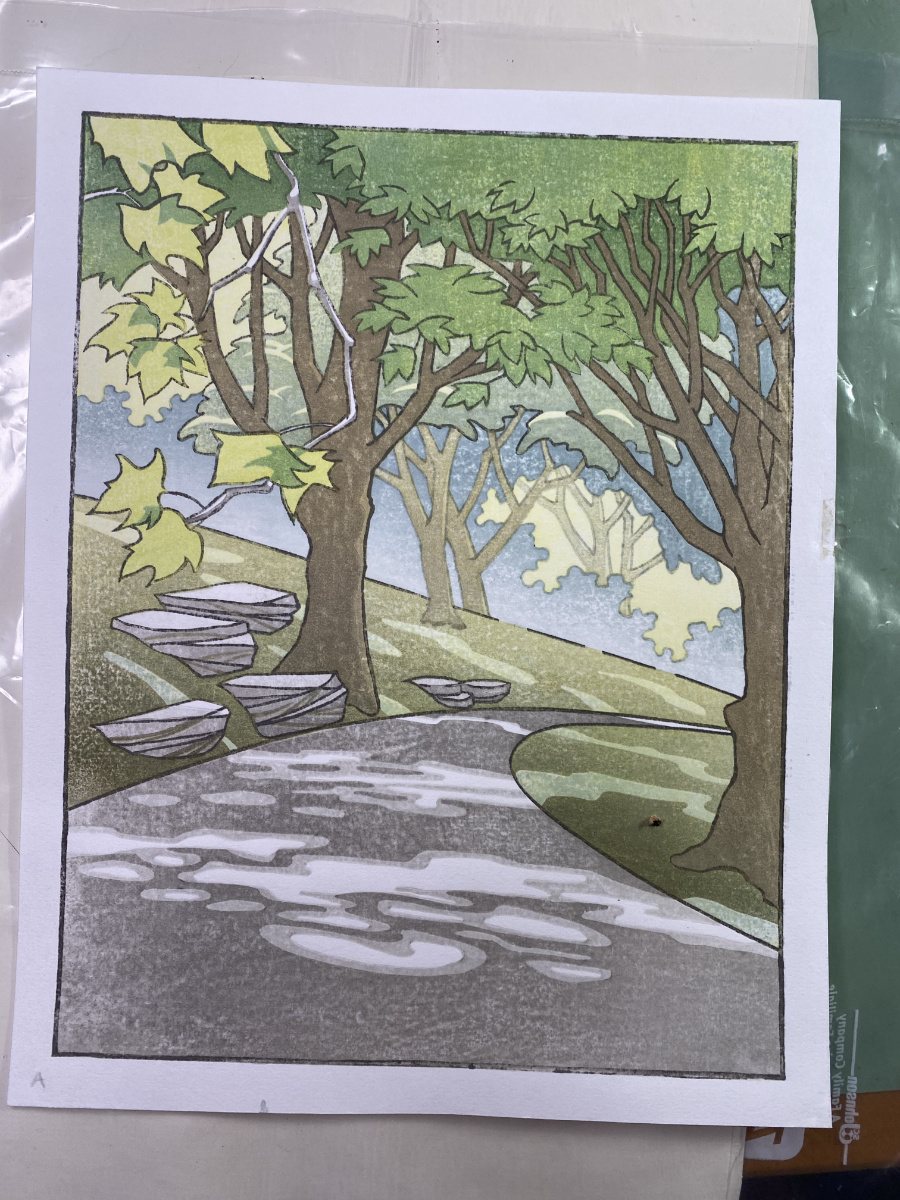
I haven’t posted this snapshot yet because it’s really sloppy, but this is about as far as I got with test printing. Mainly the aim was to test out some colors to see what works. I will probably make some more test prints; I think the bluish green is too blue, and I have since removed the hard line between the ground and the background foliage from the key block, hoping to make that a mistier transition.

It seems like a pretty complicated project so far. Here’s the stack of blocks; one is empty on the back so that’s 9 faces, and I think the test prints have about 15 impressions looking back on my notes.

I’ll give a sense of sunbeams by overlaying shadows that intersect and darken.

Originally, I thought the shadow blocks would be really straighforward, without much detail, and had planned to carve them on shina plywood. However, after making the transfer sheets and seeing the size and shape of some of the areas that need to be preserved, it’s pretty obvious they need to go on cherry. So, today I will make one more block! Because that one little bit of shadow on the upper left goes all the way to the top, neither one will fit on the blank face I’ve got — it’s a tiny bit too short.

Frankenblocks

Uncategorized

So awhile back, I ordered some cherry “thin lumber” from Ocooch hardwoods to experiment with making laminated blocks for carving. I got three pieces of 6″ x 24″, quarter inch thick Black Cherry. The pieces I got are nice looking, no or miniscule imperfections, and flat-sawn. Not wanting to commit to a big print right away, I chopped one of the boards into six approximately 4-inch wide pieces, and grabbed some baltic birch ply from the garage to use as a base. When I glued them up, this is what resulted (on one side; the back side looks similar):

Then I commenced to designin’. Dang, 3.8 x 5.9 is pretty small, and when I take away registration marks and a margin from two of the sides, it gets even smaller. So I thought maybe I could paste on some extra wood to hold the registration cuts. But then it was unsupported, and so that it wouldn’t break off, I pasted on some supporting pieces of basswood under those. Here is the result:

Everything is glued with Titebond III, waterproof and outdoor-rated — except the layers of the plywood. So I can’t submerse the whole thing. But hopefully, the kento extensions will remain stable throughout carving and printing.

Sneak peak

Yesterday I finished the key block design but wasn’t ready to move forward until the blocks were ready. I got all the Frankenblocks and all their prosthetics glued today, and did the key block transfer:

… and started carving:

I think I mentioned this already, but this is American black cherry. It seems to me to be harder than the Japanese mountain cherry I was able to use for the heron project. However, it is kind of fibrous. It will be interesting to see whether the fine lines I am trying to execute in this design will turn out ok. So far, at least, it seems better than shina in that I don’t have to be so paranoid about knocking off the top of a line.

Fireflies and cherry

Uncategorized

Yesterday I started printing the next run of the fireflies. I’m doing 20 total, 6 on shin torinoko more or less as practice prints, and 14 on the nice paper made by Iwano san for Mokuhankan. I really wish there was more of the latter; I feel like I’ve barely warmed up and I’m done, time to move on to the next impression.

Still, it takes me about 2 hours to do 20 at this stage, and my arm is sore today. The first block is solid yellow, and it is a pretty big expanse to cover with solid, even pressure. I think they are looking pretty smooth, if I do say so myself:

No time this evening after scheduled activities for more printing. Instead, I have cherry woodblock news.

My first relief printing used materials other than cherry. Linoleum, some random plywood, even lacquered particle board. The early water-based pigment prints used shina plywood. It carves easily, but is kind of spongy and is hard to carve fine detail into. Or, you can carve it, but it might well slough off and make you sad. Also, I hear from people who make more than a few tens of prints, shina wears out.

Japanese mountain cherry is one of the few preferred woods for carving wood blocks in the Japanese printmaking tradition. I got a chance to use it for the heron print. It’s hard, but not difficult to carve. It’s easy to do what you intend, carving cherry. Bad things seem to happen less often. Plus, it is very durable, and tens of thousands of impressions can be made with a block carved into cherry. So, I have been looking for ways to get more of this good wood, or wood like it, to carve blocks with.

This weekend, when I dropped off some kitchen knives to @irontoadamant (https://www.irontoadamant.com) for sharpening, I also got a double sided cherry faced woodblock. He doesn’t have a lot of these available yet, but is working on making them more widely available. It’s a very pretty piece of wood –

Both faces are hand-planed (with tricksy Japanese planes!) and quite smooth and flat. My fingers can’t feel any changes over the small places where there is some discoloration. The top layer is good thick cherry, more or less rift-sawn but shallowly, and if I were to guess the center is nice flat baltic birch. It’s pretty big – 7.25 x 8.5 “.

Attempting to be able to take matters into my own hands last week, I had ordered some cherry thin lumber from Ocooch Hardwoods. It arrived today. I gave them some special instructions: The harder, the better, and flat-sawn is best (I heard from Dave Bull at Mokuhankan that flat-sawn wood is better for woodblocks). Here’s todays’ shipment guarded by the shop supervisor.

Each is 6″ x 24″ and 1/4″ thick, pretty much on the nose. Looks fairly flat-sawn to me. No warping or cupping. Any hardness assessment will have to wait until I formulate a plan, laminate some blocks to the planned dimensions, and commence carving! Who knows when such a plan will form.

Heron project 1

Uncategorized

Fish again? Sooooo boring….

Blocks

I started working on this print during my recent trip to Japan. I was gifted a few small off-cuts of cherry-surfaced plywood from the folks at Mokuhankan (mokuhankan.com). These were only 2 3/8 inch by 7 inches, so I opted for a vertical design. Since the pieces are so small, I decided I would use the full surface, and would construct an outside kento – basically a jig to hold the blocks that incorporates registration marks. Using the full surface is sort of risky, because if the edge gets damaged, that affects the image, but I felt it was worth the risk since the dimensions were so small.

Here are the blocks as they were before I started much of the test printing.

dark gray, blue, key block
light gray, green and red, yellow