Here in Texas we are having a bit more Spring weather than we have recently – It’s not 95 degrees yet! Also there’s been more rain than in past years. It’s welcome; things have been really dry!
I finally finished a new print. It’s another print based on the Atera River, near Nojiri in Nagano Prefecture, Japan, which I visited in April 2 years ago.
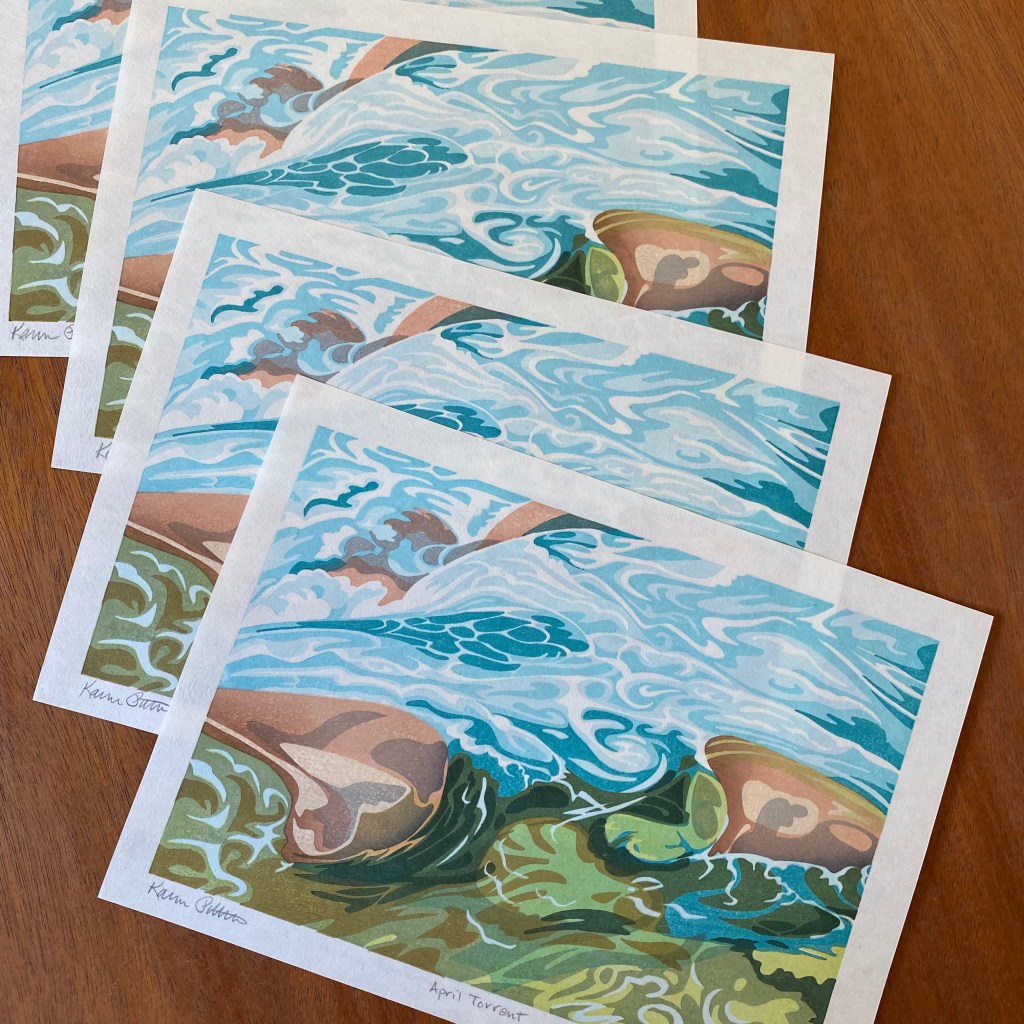
This April, I finished the first printing! 26 good prints out of 32 sheets. You can buy it here.
My mom, Katherine Pittman, was a lifelong, working artist. When she found herself on her own in her 40s, that’s how she supported herself – painting, drawing, teaching, and doing calligraphy. At one point, she got a commission to make colorful maps of towns in Texas, drawing all of the businesses and their logos in pen and ink, and coloring them with watercolor. I think some organization of Chambers of Commerce footed the bill. Some time ago, I was in Kerrville and I spotted one of these she had drawn, on the wall in a barbecue joint! There was no signature to prove it, but her hand was unmistakeable.
Her best works were beautiful, expertly-executed, realistic paintings, many in watercolor.
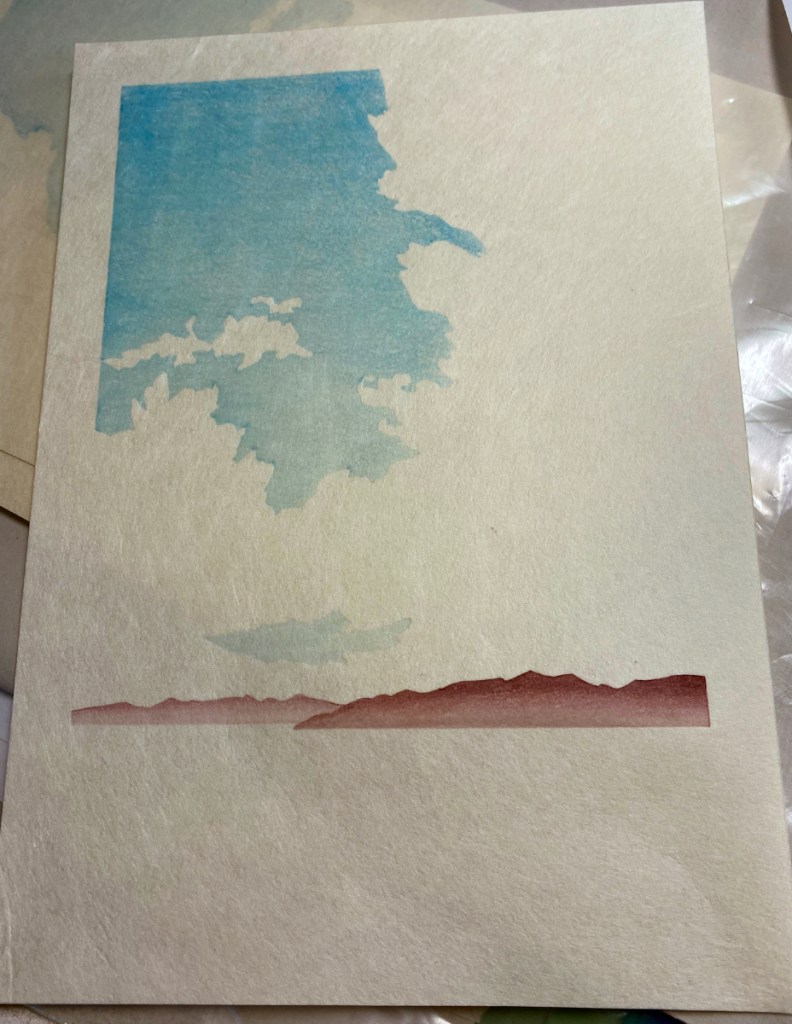
My new print is inspired by a watercolor sketch she did, in “false color”, of the Mora River in New Mexico. I think it was a sketch made on site. Since she is no longer around to give her input, I can’t really call it a collaboration, but I think she would approve!
10 blocks, 16 layers, on Kitaro Kizuki (100% mulberry). If you are interested, get your copy here.
Here’s Katherine’s original watercolor sketch, probably on cold-pressed Arches (her fave) – just an unsigned sketch, not a finished painting. She did produce a finished piece, and if I can get a good photo I may post it later. It’s been hard for me to build up the saturated color in a block print that one can get from strong pigment and brush; something to work on. And you can see I paid a lot of attention to the rocks in my version! I LOVE rocks 😉
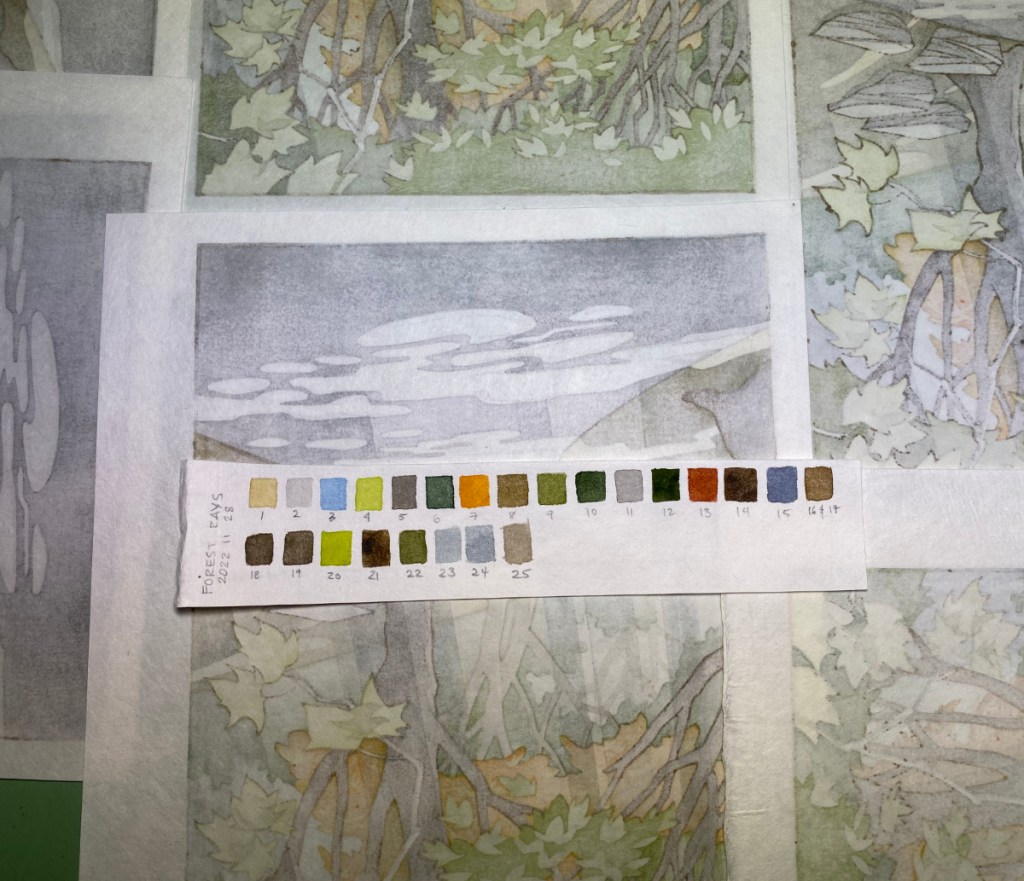
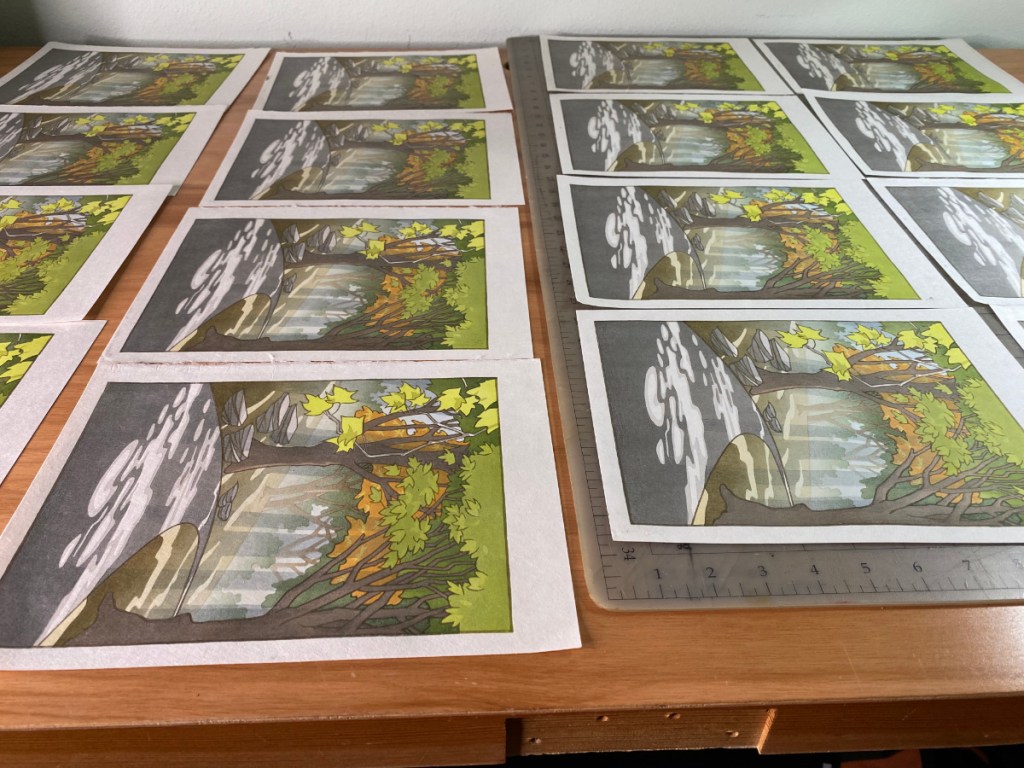
What did I do in 2022? I finally finished Forest Rays! At least I think I am done. The prints are still in the drying boards and will need a careful look-over before I add them to the store, but here’s a preview. I think I captured the feeling I was looking for – humid forest, light streaming through the branches, leaves caught in sunlight glowing brightly.
7 pieces of wood (6 self-made cherry ply and 1 shina ply from McClain’s), 19 printable areas including the key block, 25 impressions. (I had prepared separate key lines for the trees and foliage in the distance, but decided not to use them – that would have made 26 impressions!)
back of some prints and colors usedbefore the rays and key linesdrying
The paper is Shin Hosho from Woodlike Matsumura. When I started printing, I thought “Excellent, this paper is really tough, and I’ll need it for this print!” but by the end it was quite soft and barely hanging on. I had thrown in a few sheets of Student Kozo as warm-up sheets, but I gave up on them about 18 impressions in because they were fouling the blocks with fibers that kept coming off.
I’m looking forward to the next print! It will be a simple one, and I’ll aim to finish within a month – fingers crossed. Back to the carving bench!
I’ve been busy, making progress on Forest Rays. Here is an animation showing the first 15 impressions.
It’s remarkably hard to do a good job at an animation like this. I tried to set the light up the same for each shot, but I was printing at different times of the day so there were some hard-to-avoid differences that are not solved by a simple white-balance. Also, to make them all the same size I had to stretch and shrink parts of each image to fit the same frame; some frames are stretched in places that others aren’t.
There are another 8 or so impressions to go, at minimum – better get back into the studio!
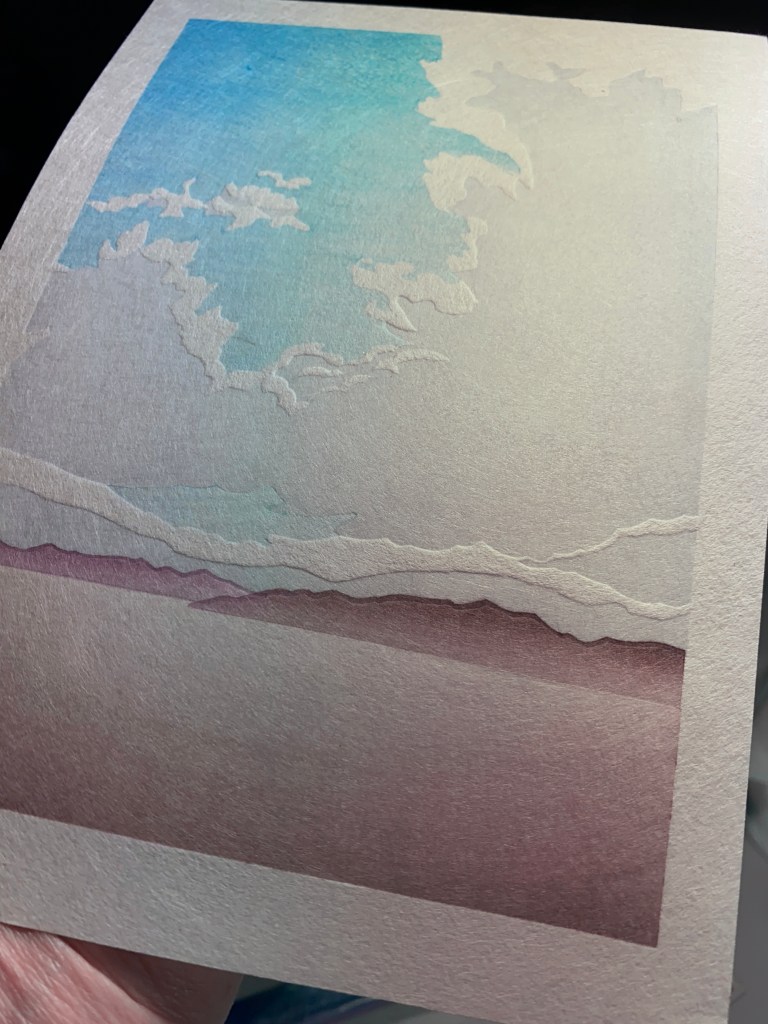
You can find it here. I’m pleased with this one; it’s really simple, but the embossing and gradations turned out well.
I have a few printing progress shots:
2nd impression3rd4th5th6th – another on the sky7th – cloud gradation
After the 7th impression shown in the last photo, there were four more: a third gradation on the sky, two to build the medium shadows on the cloud, and one for the darkest cloud shadows.
I ended up with quite a stack of prints! However three were mistakes, and 5 had paper flaws that make them seconds. There were more bark fragments in these sheets than in the last sheets from this batch.
Although I originally imagined this print as done in monochrome – perhaps all in blue, in homage to the aizuri-e tradition – and even mocked it up in blue, I abandoned that plan pretty early in the test printing process.
Here’s the final palette I landed on. I used a fair amount of sumi in the last few impressions! Number 14 was the key lines; the 15th was a bokashi to deepen the shadows on the bushes ahead.
I waited until near the end to print the key lines. Here’s what the print looked like just before, with impression 13 (grayish violet) as the most recent:
After adding the key lines and the deeper shadows, and drying –
I’m now wondering if I can pull off a sunset image with the same blocks! Hmm… might need more/different shadows.
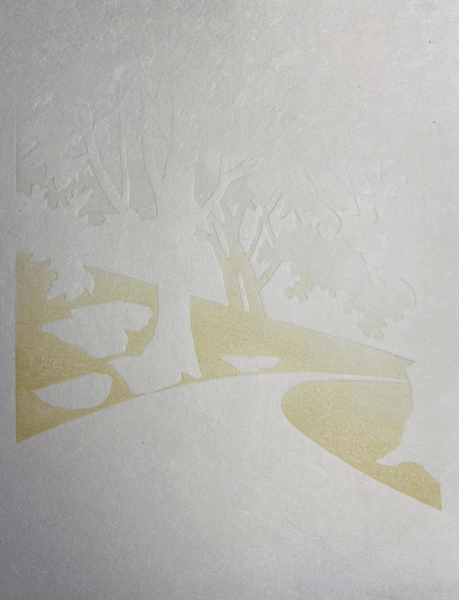
It’s so much more pleasant to print on quality washi! This time I am using the Kizuki from Kitaro. I’m 4 impressions in at this point; here’s what the print looks like after 3. I did two impressions of the yellow to build the color and get a smoother tone.
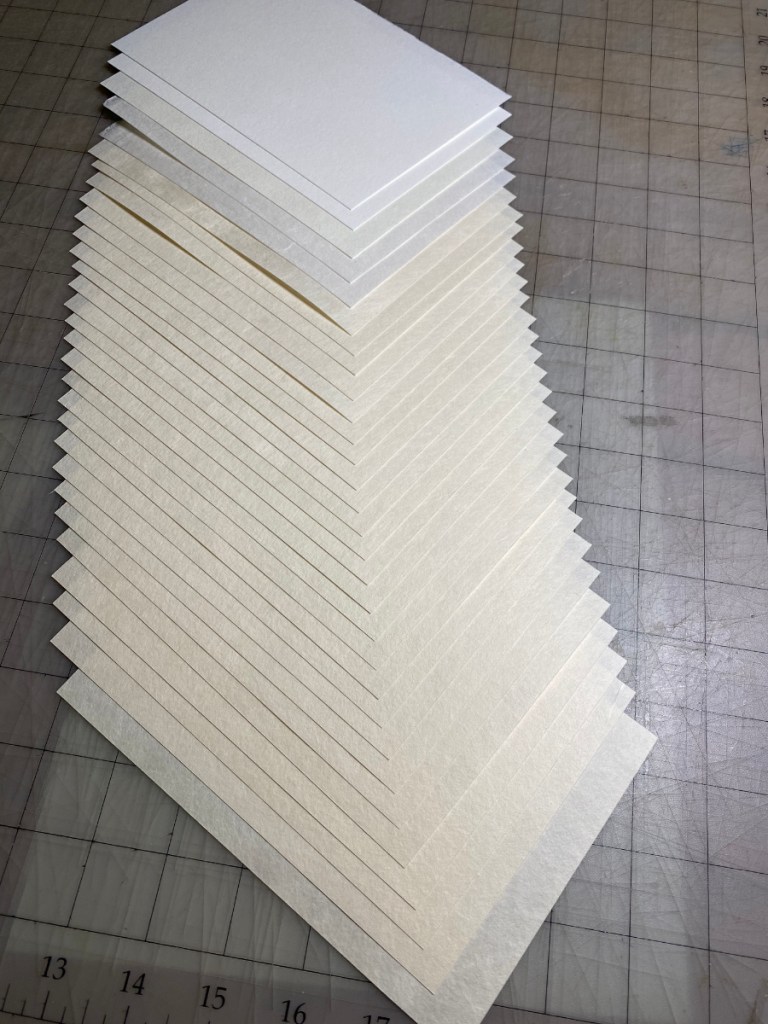
Here’s the paper I will use for the current print. I’ve got 25 pieces of Kitaro’s Kizuki, and 5 pieces of a few other kinds I had lying around that I will use for testing. Because this is a really small print, I picked a sheet of the Kizuki that was on the thin side. It’s a completely handmade product, and there’s actually noticeable variation in the thickness.
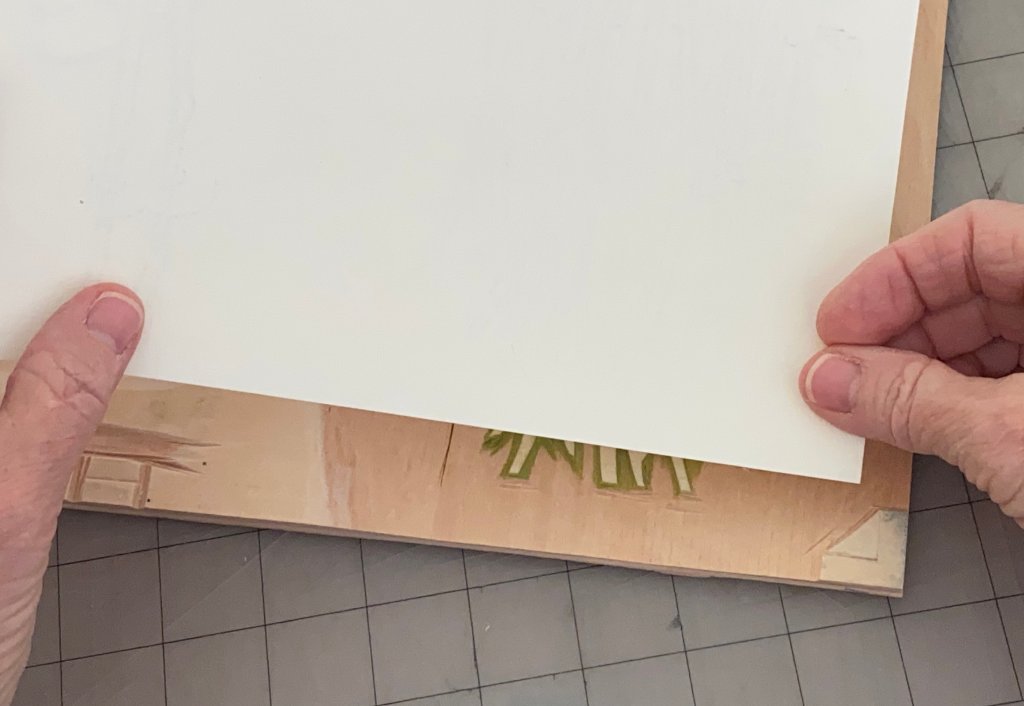
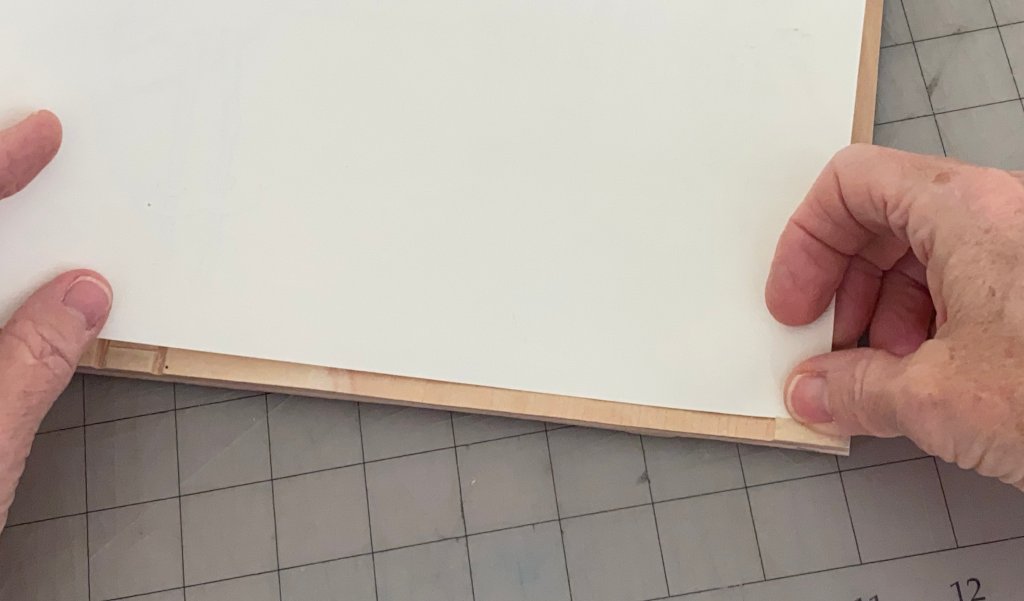
I’m applying a small dot of clear nail polish to one corner – the corner that will be inserted into the corner kento (registration notch) – of each piece of paper. This is a trick I learned from the printers at Mokuhankan. For a simple print with only one or two impressions it wouldn’t be that important, but reinforcing this corner prevents it from wearing and changing shape with repeated impressions. That way it’s possible to get precise registration every time.
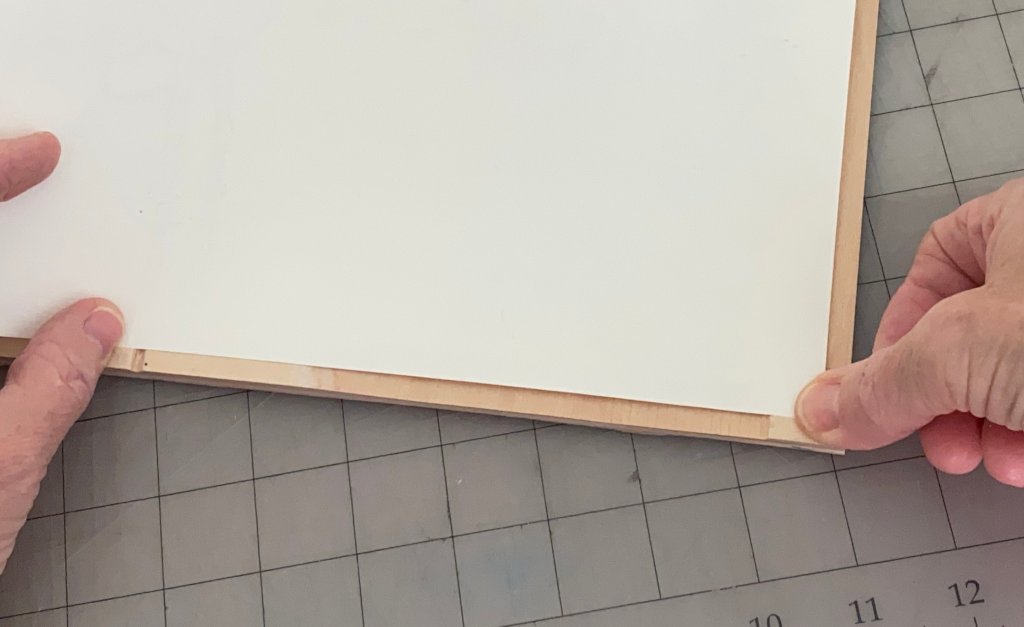
Here’s how the paper is placed when printing. I’m demonstrating with a block for a different print. First the corner is inserted into the corner notch on the right, then it’s placed against the little ledge on the bottom left, then laid flat on the block. It’s not necessary to reinforce the edge on the bottom left, but the corner can easily wear if it’s not strengthened!
I apologize for not posting much in the way of in-progress notes about this print. There are some things I’d like to talk about, and I might get to them eventually. But in the mean time, I’m done! Here are some shots of the prints drying.
This print run included 30 prints – 4 on Shin Torinoko as practice prints, 20 on Kitaro’s (https://www.washi-kitaro.com/) Kizuki, and 6 on the Shin Hosho I ordered from Matsumura-san. There’s some variation in thickness in each of these washi batches. One of the sheets from Kitaro was noticeably thicker than the others; this didn’t seem to affect the printing very much, though. The Shin Hosho sheet I used was thinner than any of the sheets I used for the Naoshima Coast print, and I really liked printing on it! It was easy to get a smooth, intense impression. You might remember I struggled with smooth impressions on the Naoshima print. I think if all the sheets had been like this one, printing would have been a piece of cake!
Here’s an example of the finished print, held so the embossing can be seen. This is one of the Shin Hosho sheets, but the Kizuki prints also turned out quite nicely; the paper color is a little creamier on those.