
Getting pretty close to finishing the first block! The picture doesn’t show it, but there are some large areas that still need to be cleared. After that, I’ll do some testing/tweaking, and finalize plans for the color blocks.

Getting pretty close to finishing the first block! The picture doesn’t show it, but there are some large areas that still need to be cleared. After that, I’ll do some testing/tweaking, and finalize plans for the color blocks.
We don’t get snow in Austin very often. Today there was rain predicted, with a chance of frozen precipitation later in the day. It started snowing midmorning! I took a picture a little later.


In all we got a couple of inches, very slushy. Nice day to stay inside carving!
I also did some thinking about how many blocks I will need. At this point it seems like 10 + the key block.
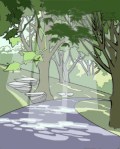
It took me awhile – about a month! – to work out the design for my next print. Here’s a little cartoon preview; the final print probably won’t look anything like this, but I hope to capture the same (or better and more mystical!) mood. I’m satisfied enough, though, to move forward with drawing and cutting key lines.


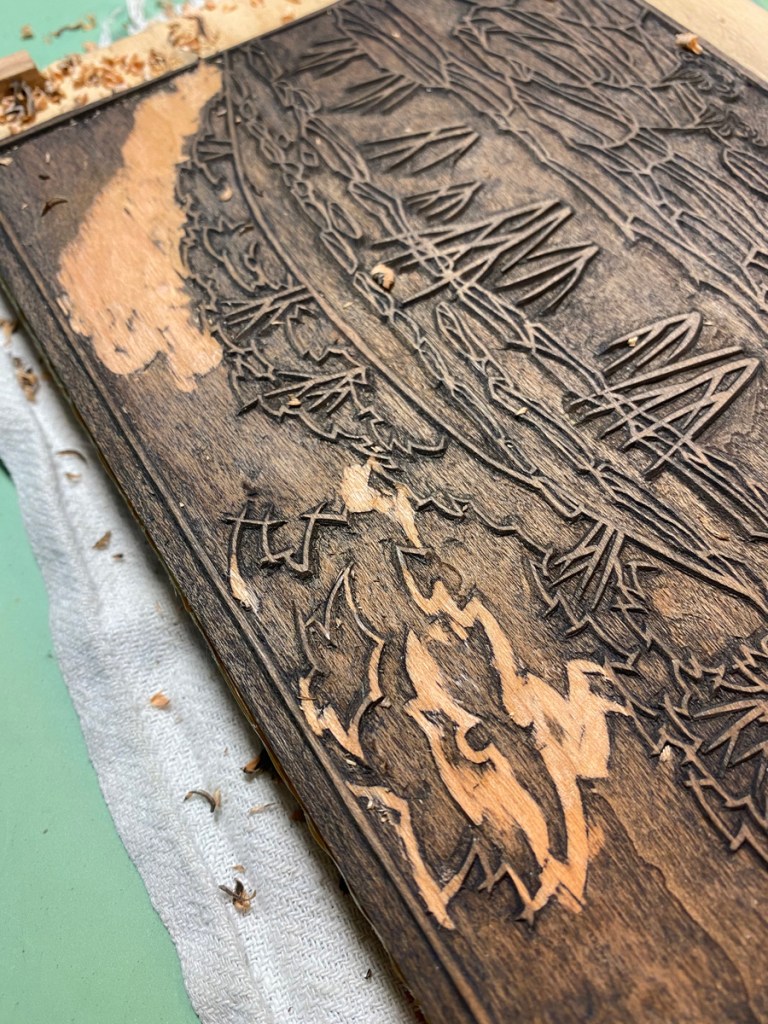
The path was long – I started with a pencil sketch, then imported into a drawing program and did a few vector versions so I could test out color/shading variations, then traced a couple of times before being happy with the lines. Above is the finished line work, and how it appears after transferring to the block, plus the first day’s carving.
There are lots of lines here! Some of them are not going to be part of the key block, but will be saved as other transfer sheets that I will use later when I carve color blocks for regions that won’t have outlines, such as the areas of light and shadow on the path.
The other day on David Bull’s Twitch live-stream, Dave had a guest who is studying woodblock carving with Motoharu Asaka. The guest had brought his box of carving tools, a nice clear-ish plastic latching container. It was highly organized, with a little slot for every tool, arranged by type and size. Dave showed his, which was an open, beat-up cardboard box with tools jumbled inside, sufficient for keeping the tools from rolling off the carving desk.
To be fair, the nice latching case is almost a necessity for someone who has to carry tools from one location to another. Dave carves on his own bench, and doesn’t need to take them anyplace else, so an open box is all he needs.
I guess I should show mine!
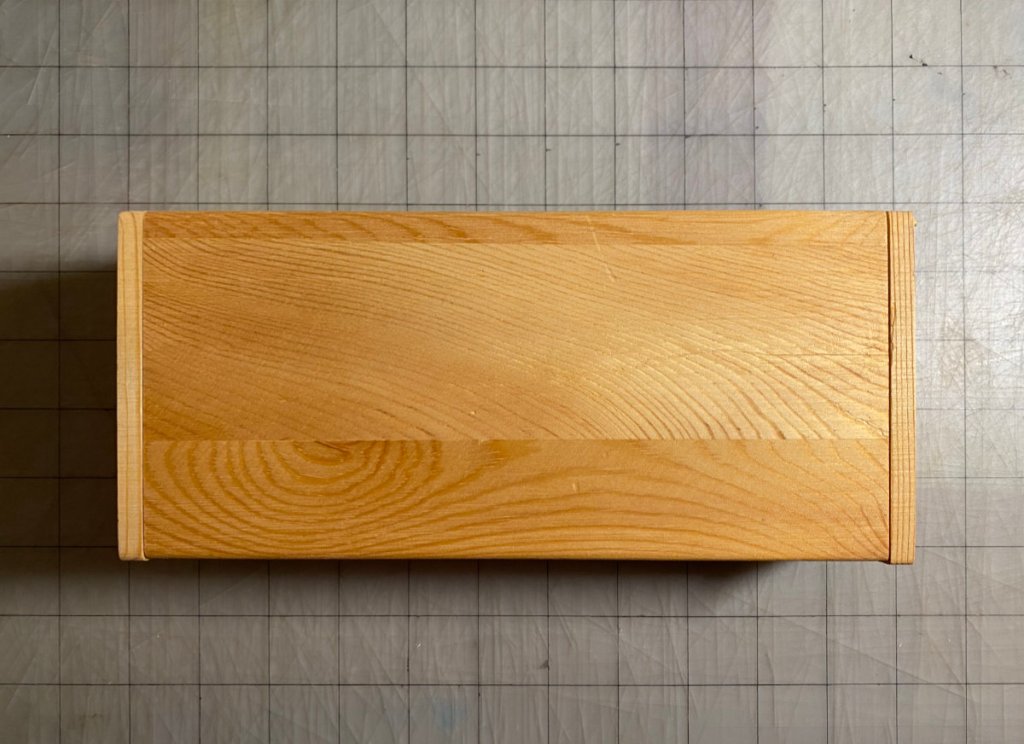
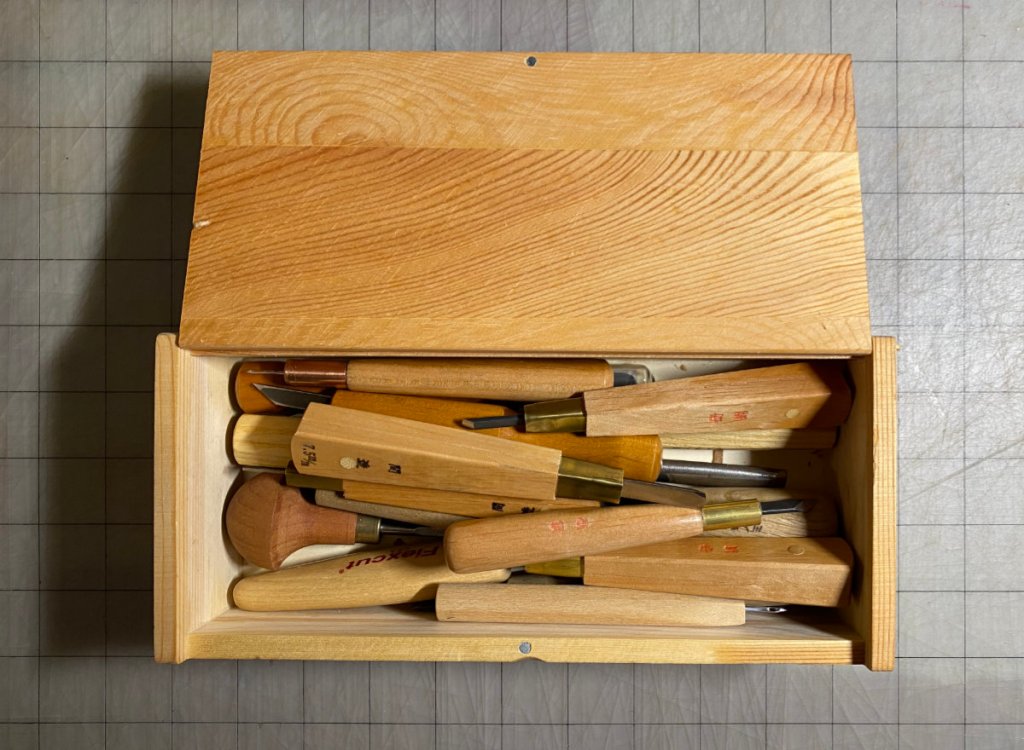
I had the cardboard box for awhile but got tired of it. Plus it was a little too short. If I needed to take tools on a trip, I might put them in a closed cardboard box! This one is probably too fragile for travel, but it makes me happy.
Here are the tools I use the most, ordered approximately by how often I use them.
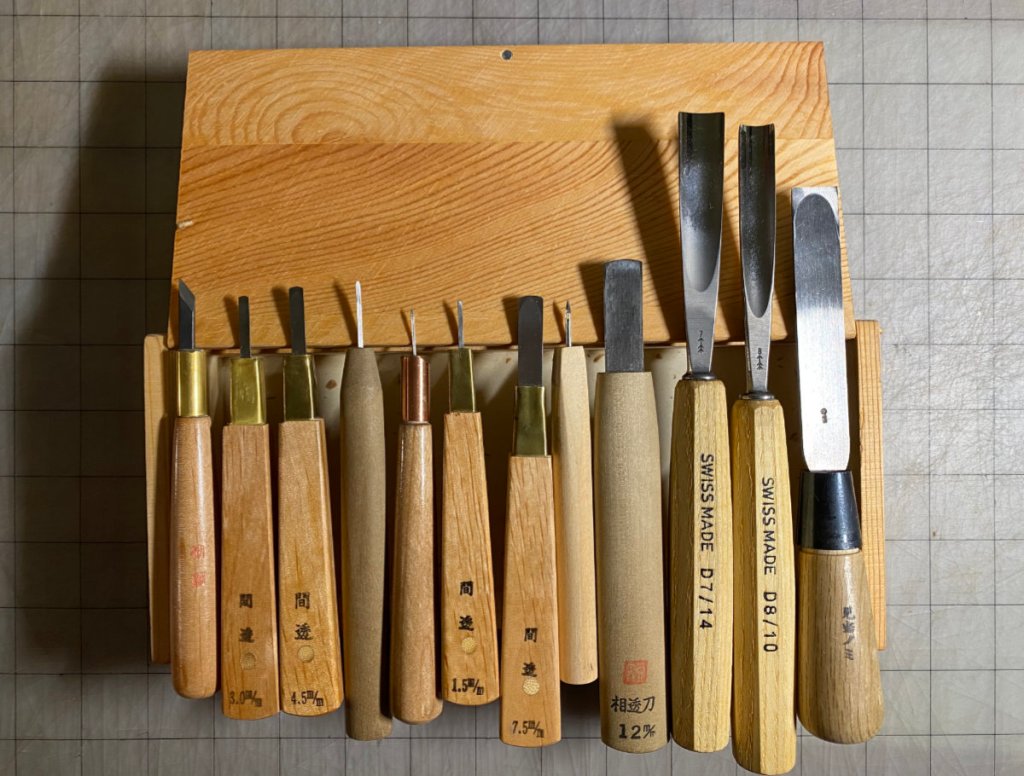
The one on the left is the knife. I have a larger knife, which I used for a couple of years, but then I got the smaller one which I like better. The one on the right is the kento-nomi, a chisel (nomi) with just one job: making registration marks (kento). I use the U-gouges immediately to its left for clearing large areas of unwanted wood. (I don’t know if the U-gouges are designed for tapping with a mallet, but that is what I do with these, gently. I don’t use a mallet with any of these other tools!) Most of the tools in between are aisuki (間透き), or bullnose chisels. These are used for clearing out areas of wood of varying size between knife cuts.
I’ll let you in on a secret – the first run of this print is already finished! I can’t show it here though, because I want it to be a surprise to some folks who will be getting it as a holiday gift. But I’ll show a bit of the preparation process.
It’s going to be a small print. You might remember seeing my post about the “frankenblocks“. I only used one face of those 3 blocks for the leaf print, so I decided to use the rest for this one. Because one of the faces already had the lines for the leaf print (Finally Fall), I protected it by taping a piece of paper over that face. You might see the tape on the bottom of the rightmost block in the picture on the left. I made another pass over the remaining faces with a thin scraper, taking care to also scrape down the little pieces I glued on to make an external kento (set of registration notches). If those pieces stick out more than the rest of the block, then the parts of the block adjacent to them will print faintly, which would be maddening!


I made up a handful of transfer sheets. These are gampi paper laminated with reposition-able spray adhesive onto card stock. (Card stock is not the best backing paper to use if you plan to woodblock-print key lines on it (which I eventually will do), because it changes size quite a bit when hit with moisture. It’s what I have, though, so it will have to do.) Laminated with a thicker paper, one of these will go through a printer just fine! If you look closely, you can see the pencil lines I marked to position the gampi. The design for the key lines was drawn by hand with a brush-pen, then scanned so I could clean it up, make the blacks black and whites white, and size it precisely to fit on the blocks. After a few test prints I could be confident where the printer would place the image on the page, hence the pencil marks.
The rest of the transfer sheets will get used eventually, to transfer the lines of the key block to other blocks that will print regions of color. To do that, I will use the carved key block, so I will need to trim the transfer sheets so that one corner and edge fits into the registration marks.
A couple of years back I started work on a print of this sly character relaxing in a lake, perhaps thinking about his next snack. I made a few test prints and didn’t go any further because they just weren’t turning out well.

This was the first print I made where I used the hanshita method to transfer a print’s lines in order to carve color blocks. In this method, the key block is printed on transfer sheets made by laminating a thin sheet of paper, usually gampi, to stronger paper with removable spray adhesive. This post shows some prepared transfer sheets for a different print, which are then glued face down onto the clean color-blocks-to-be using the same registration marks that will be used for printing later. The stronger paper is peeled off, then the surface layers of the gampi are peeled off to yield a clearly visible guide showing what needs to be carved. After carving, the rest of the paper is washed off, and voila — the color block is ready to print.
In a dumb, rookie mistake I used the wood glue in my drawer – Titebond III – to affix the transfer sheets to the blocks. Oops! Titebond III is “proven waterproof” and “offers superior bond strength” – really not characteristics suited to my task! As a result, I couldn’t ever completely get it off the surface of the color blocks, and they basically refused to hold and transfer pigment evenly. That’s why the blue is so patchy and uneven.
I still have a bunch of shina plywood that I don’t see myself using for a new project anytime soon, so I think I will carve some new color blocks for this print. I’ll use the original key block.

It needs a bit of cleanup. I carved it back when I was using u-gouges and v-gouges, so the valleys are really rough. Some of the lines could use refining.

Another thing I did was to introduce some discontinuities in the lines of the hills that are supposed to be reflected in the water. I am hopeful that these will help the reflections look more like reflections. These changes on the key block mean the location of the gaps will be transferred to the new color blocks, so those blocks can have aligned openings that produce white lines in the finished print.
I don’t envision doing a huge run of this design, but I would like to do it justice with some well-executed prints!
I’ve started testing the Balcones Canyonlands blocks. I’m trying a variety of pigments, in various combinations, to decide what to use for the final design. I don’t think I’ve gotten them right yet — for example, I think the base color of the hill should be something a little more gray. Also, these test prints are pretty rough, and are missing some impressions.
When I carved the clouds, I changed the shapes from the original sketch to make them rounder. I knew they wouldn’t look right with the key block outlines, as you can tell from the two test prints on top that I printed the key block on. So here goes, I’m removing them!
The next little round of tweaks will involve using a small part of one block that I left un-carved earlier to carve some faint shadows and outlines of rocks under the water. Here I have sketched them out:

This is part of the one block I’m using that consists of 1/4″ American holly laminated on plywood. I decided to give holly a try because the wood seems very homogenous and the grain is inconspicuous. Plus, it is shrubby, and boxwood (used for very fine detail by some wood block carvers) is shrubby. It turns out the plants are not related at all (except that they are both Angiosperms…), and holly is only marginally harder than cherry (American holly: Janka 1020; American black cherry: Janka 950). Still, it cuts very smoothly and is not at all splintery. The main use of this block is the base color for the hill; even though I was hopeful holly would be good for carving detail, I didn’t want to rely on it straight away for that purpose and chose a large color region as its first trial. Carving these fine outlines and small shadows will let me test out whether it suffices for small details.
Just a quick update: I’m mostly done with carving the current block set. There are 4 blocks with two sides, so eight printable faces. Seven of them are carved. The upper left block on the second image hasn’t been carved yet, but I’m holding off because I won’t be sure what else I might want to put on that block until I’ve done some test printing.


The blocks have been cleaned off (except for the un-carved one). Here are a few close-ups!


I hope the ripples on the water turn out OK; I pretty much winged that part.
And in news of international shipping, I am pleased to announce that the glue I ordered on April 11 from Amazon, finally arrived on June 16! Yes, all the way from Japan. In the before-times, this sort of shipment would take about a week, maybe two. I feel sorry for the seller, because they have gotten some unkind comments about something that is NOT under their control. Anyway, I’m happy it finally arrived!


Now, time for test printing!
Here are a few minutes of me doing something I enjoy! Please ignore the technique; purists would scoff.
The next print I am working on is a stylized interpretation of a hill and a creek near the Doeskin Ranch trailhead of the Balcones Canyonlands National Wildlife refuge. I sketched in pencil, then scanned it and moved some elements around in photochop to compress the empty space and emphasize the parts I found interesting – so the final line-work is pretty far from the photo!
Some time ago I finished carving the key block, printed transfer sheets, and spent about a week in a drawing program experimenting with color overlays enough to satisfy myself that I could make a block set work. Since then, I’ve applied the transfer sheets and started carving the color blocks. Here you see the transfer sheets, marked up with the color regions they will be used to print (not the actual colors, of course!)

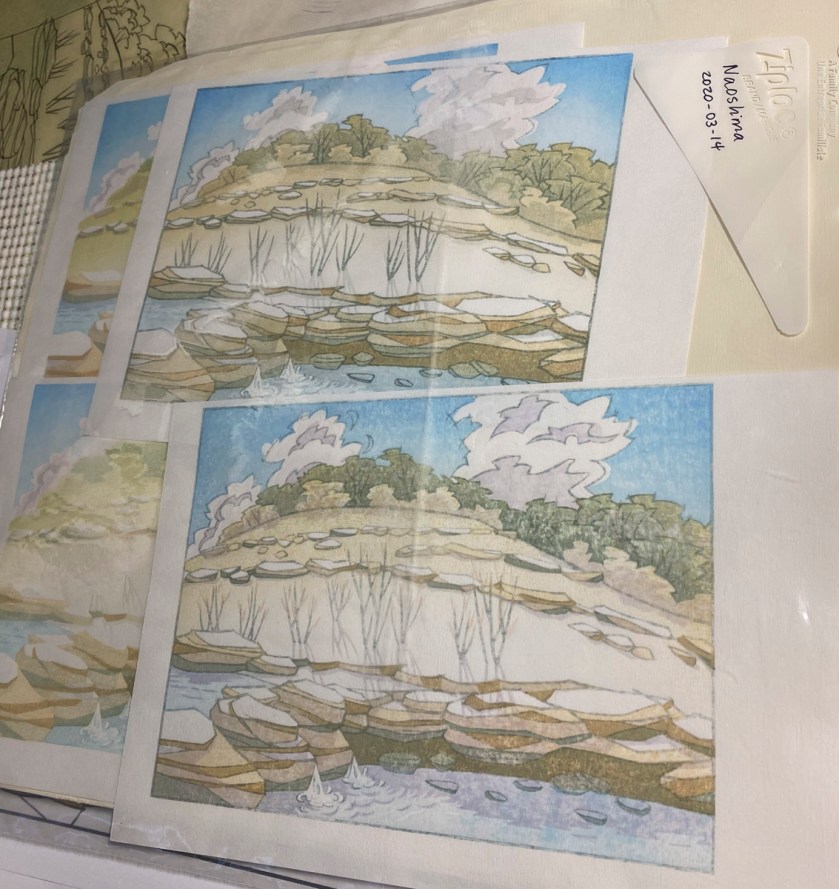
This is pretty different from my approach to the Naoshima Coast print, where I was strongly driven by a photo, and tested printing after each color block to decide the shapes and pigment for the next color block. That process took a long time!
In this case, I’ll be using 4 double-sided laminated blocks, resulting in 8 carve-able faces. The key block counts for one, so I have seven faces left, and so far nine color regions. I’ve been able to combine two of those regions with others, so they fit on the seven block faces, and I still have a little leeway to add detail in parts of the color blocks that aren’t spoken for yet. Here are the transfer sheets, applied, with the excess transfer paper peeled away.


What’s going on the second photo? It looks a bit different, right?
The key block is on the upper right. I’ve protected it with a taped-on sheet of paper so that when I carve the other side, I won’t damage the lines.
In the block on the upper left, I’ve only peeled the excess gampi paper from the part of the block I have plans for so far. Not sure why I did that, but I know I might use some of the lower part of the block to add detail later.
And the block face on the lower right is a different kind of wood! It’s American Holly (Ilex opaca), which is a fairly dense, fairly hard, very white, tight-grained wood. It’s a little harder than American Black Cherry. I decided to try it out because I wondered if it would be similar to boxwood, which is sometimes used for key blocks. Not being brave enough to use it for a key block I used it for the simplest color block. This may backfire on me if it turns out that it doesn’t moisten properly for printing. It does moisten, which I demonstrated to myself when I wet-sanded it in the final smoothing.
Carving wise, it’s fairly easy and smooth to carve – at least for the simple shape I was carving. When clearing large amounts of waste, the resulting surface is very smooth and tight, as you can see with the 4.5mm knife on the left. However, the piece I used had some grain surprises!


On the right is an area where the grain dove down, and so when I tried to clear, I got a hole with lots of tear-out. The region did not seem to interfere with the adjacent shape though!
I will finish carving all the so-far-planned color blocks before printing anything, I think. Two down and one started, so far. See you in a few weeks 😉
