I’m in my 4th round of test printing for the Forest Rays project. It’s been a bit of a struggle, mostly because there are so many areas to print – 11 wood faces, 18 printable areas, 18 sets of registration marks, and lots of areas that overlap so they get printed multiple times.
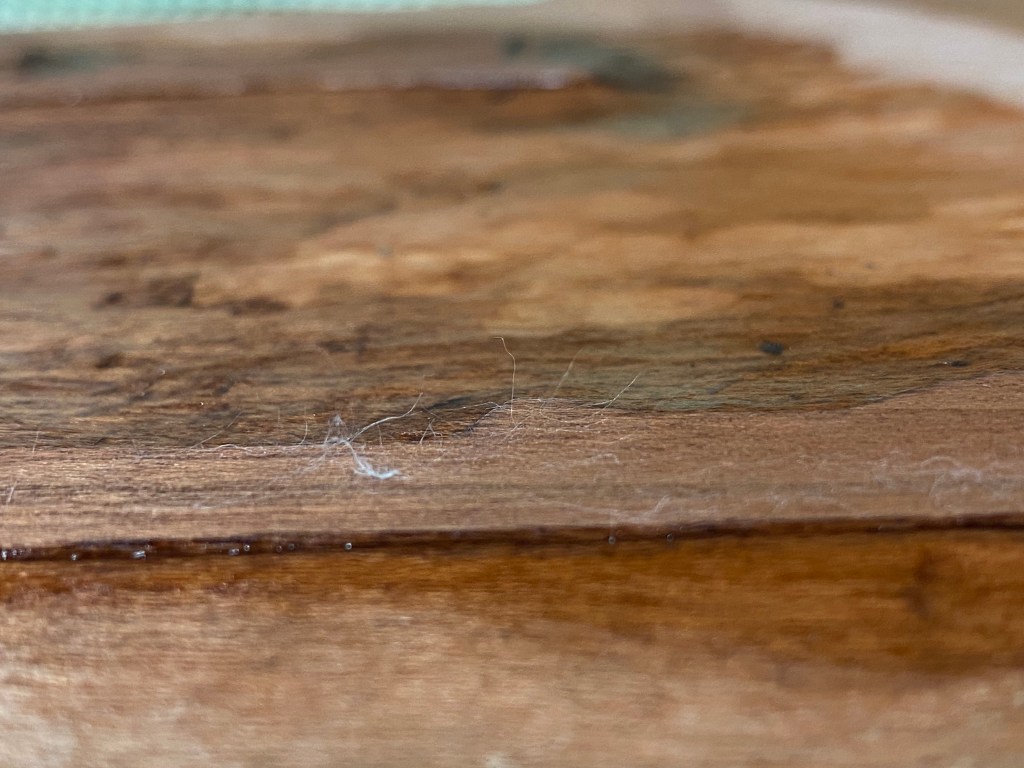
I recently received some “Student Kozo” paper from Kitaro, and with some hope, am using it for this round of testing. Unfortunately it’s weak and floppy when damp, and seems to shrink and swell more than I’d like. And more frustrating for testing this particular print, when an area gets more than one or two impressions, fibers start to separate from the face of the paper; you can see that below.
I’m plowing forward despite the frustrations, and am succeeding at my aim to get more pigment onto the prints! Pretty soon though, I need to just take the plunge and actually print the things. I have a stack of Shin Hosho from Wood Like Matsumura set aside for this one; that paper is pretty tough!
I wonder if I might be able to add more sizing to this paper to toughen it up and be able to have less trouble testing prints that have lots of overlays. At any rate, it’s pretty nice for the price, so I can use it for simple prints without many overlapping colors.
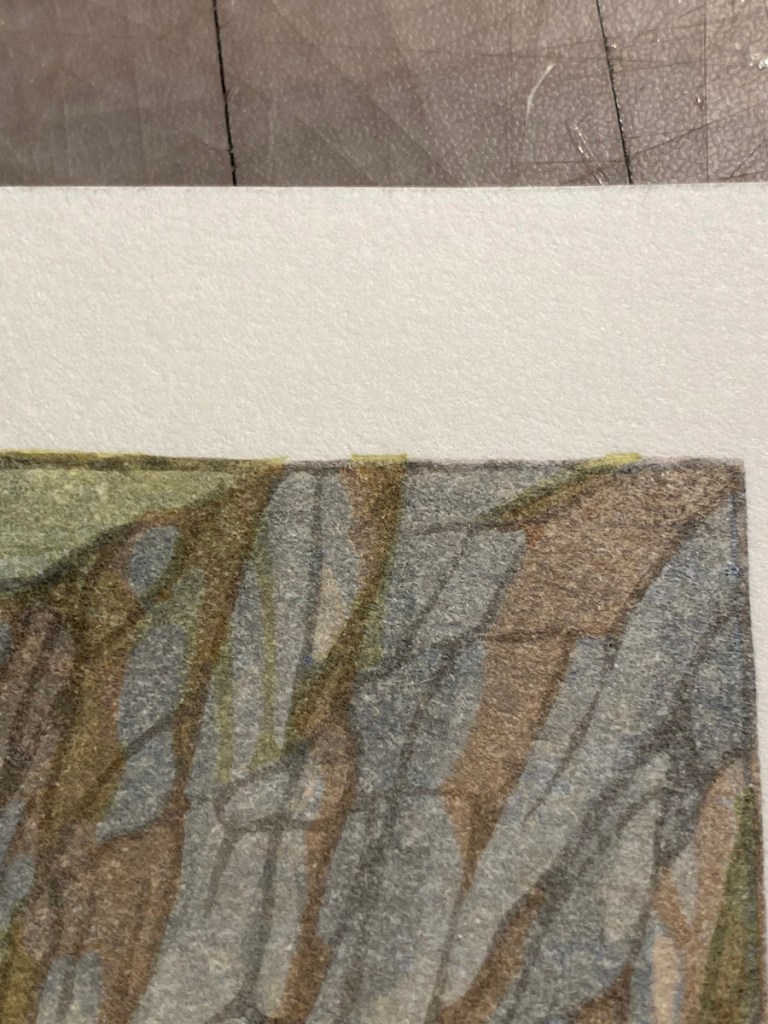
Despite being careful, wiping the edges while printing and shielding the registration marks with a little piece of brass sheet or a spoon (yeah that works pretty well too!), sometimes the white border around a print gets a stray mark of pigment like the image on the left.
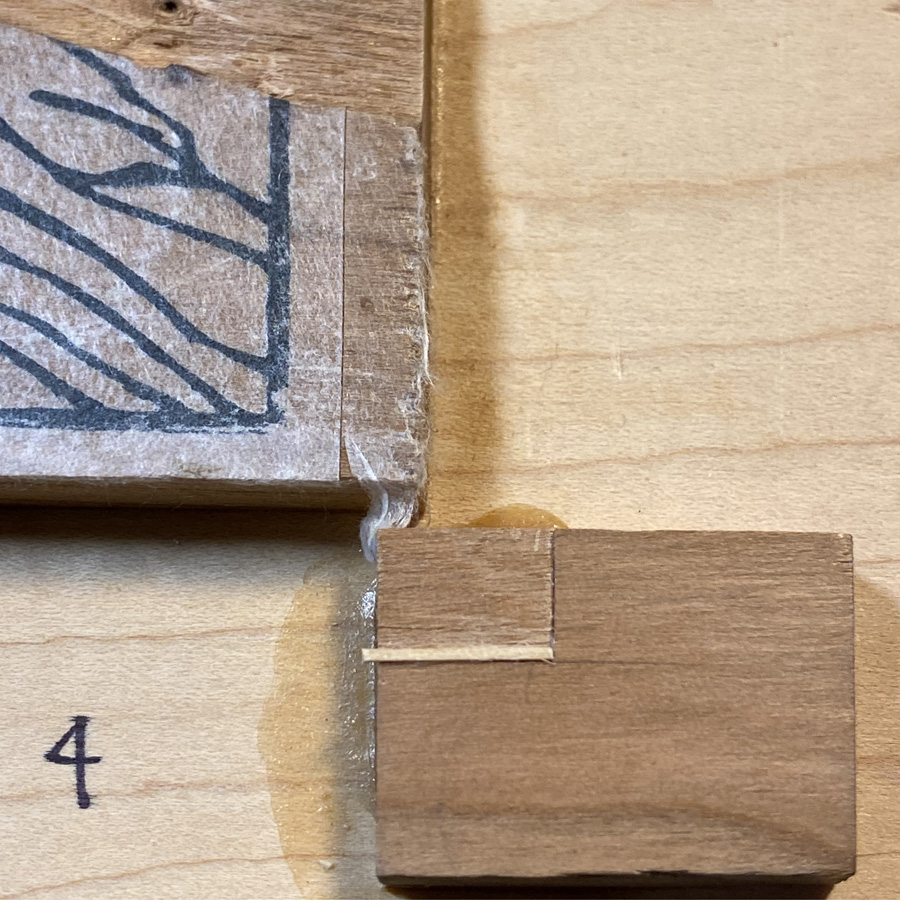
What happened on the right? Not an eraser and not white out! I used my knife to fix this little mistake. The knife has to be really sharp, especially on this Echizen Kozo paper, which is really fluffy. I’ve heard that on some paper, a little sandpaper might remove spots like this but not on this paper (I tried) – it just raises the fibers and makes it look fuzzy. Instead, a very shallow slice on either side –
— and the spot is banished! I learned this (and got the bravery to try it) from watching Dave Bull on his Twitch live stream. Thanks Dave!
Alright, Light Show reprint #2 is completely done, time to move on. I’ve been working on a design based on some scenery from a recent socially-distanced hike I went on with some friends in the Balcones Canyonlands Preserve northwest of Austin. We drove separately, did not hug or get anywhere near close enough to, but it was good to be able to talk in person – 10 feet away! – to human beings I know and love.
It was a lovely day, early Spring and still cool, and up the hill from this sweet little stream and pool was a hill strewn with rocks and crowned by trees. Once home, I commenced to sketching. My ultimate design is only loosely based on these images, is fairly stylized, and really focuses on rocks. (I love rocks!)
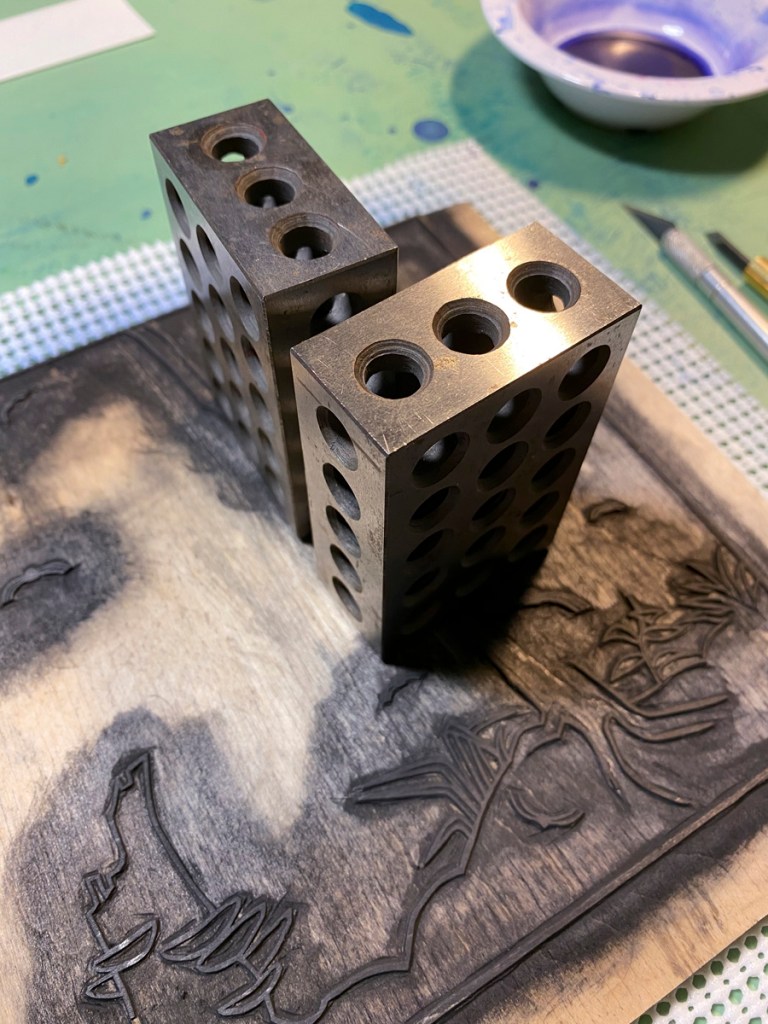
But before I can make another print, I need woodblocks. I have enough cherry thin lumber to make three printing surfaces that are about 6″ x 8″, and some holly that I got as an experiment to see if it might be sort of like boxwood, plus some plywood to laminate it too, and some odds and ends to paste on for registration marks, so they can be outside the 6″ x 8″ image region. That about exhausts the supplies I have lying around! After glueing and clamping —
— I now have two double-sided blocks, with three cherry faces and one holly. I have no idea how the holly will work. It seems very homogenous and free of grain, but it might be lying to me!
I also have some Shina ply, which I suppose I could use for color blocks if I can’t get anything better in time.
Here I’ve started on the line work.
Next: planning for which paper to use, and how to cut it to avoid waste. Then I can properly size the line work, and make a transfer sheet, paste it down, and start carving! Woohoo!
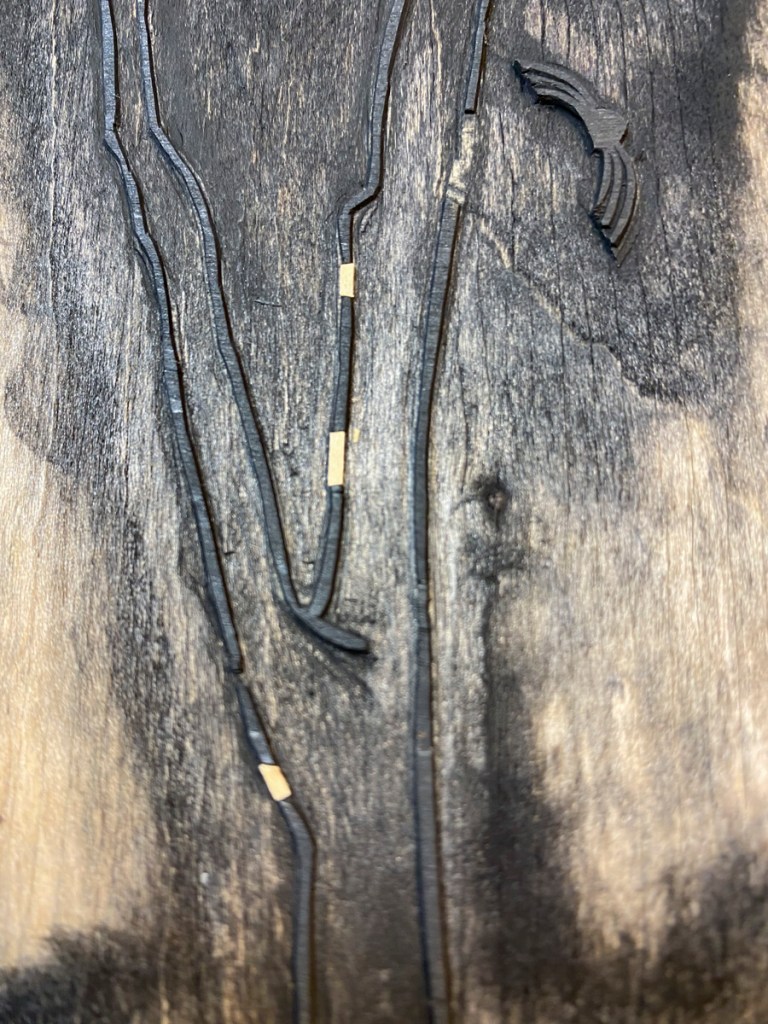
I had planned to print last night, applying maybe the last impression – the dark lines with sumi – on the fireflies, but when I looked at the block, I saw that some lines were missing. Blasted shina plywood again! You can see pretty clearly below that I filled in some places where the top ply went missing. Before printing, I’ll need to let the glue cure and then trim the patches to match the lines they are patching.
I’ve learned before that I need to let the glue cure really well before trying to use a block I’ve repaired this way. The next time I’ll have a chunk of time for printing is Thursday. There are 25 sheets in my stack – 19 of them on the Echizen Kozo – and it has been taking me about 3 hours to get through the stack, clean up my tools, and get the paper packed for the freezer, and I have that kind of time only 4 days a week.
I hope everyone is staying safe out there, and thanks for reading!
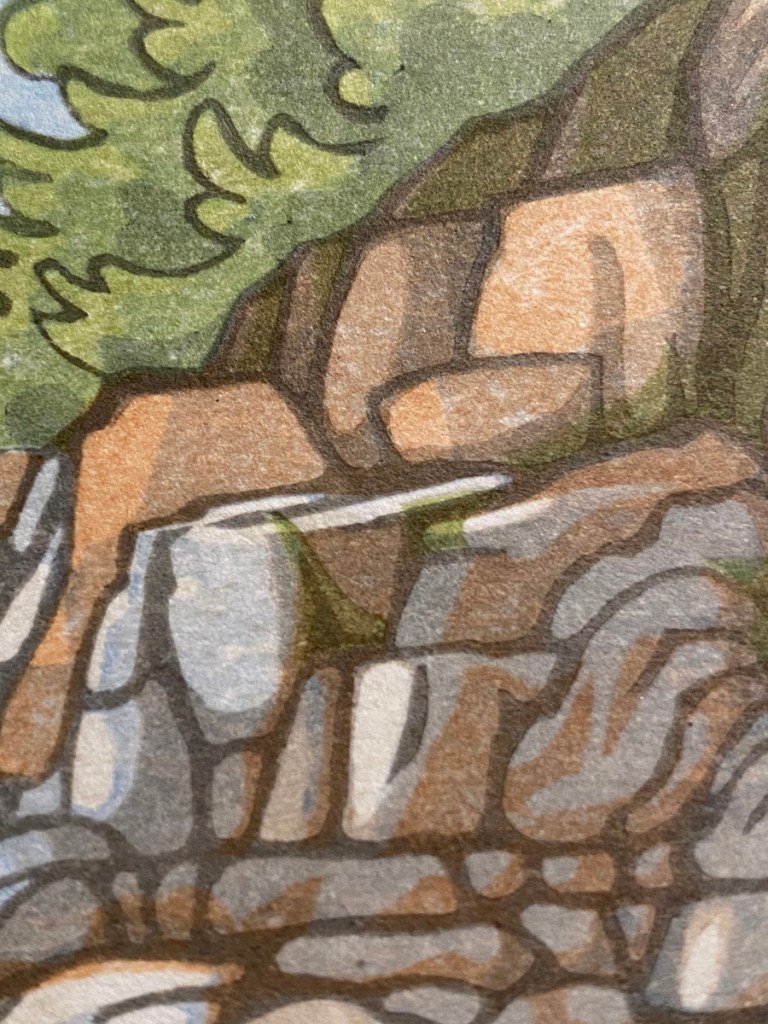
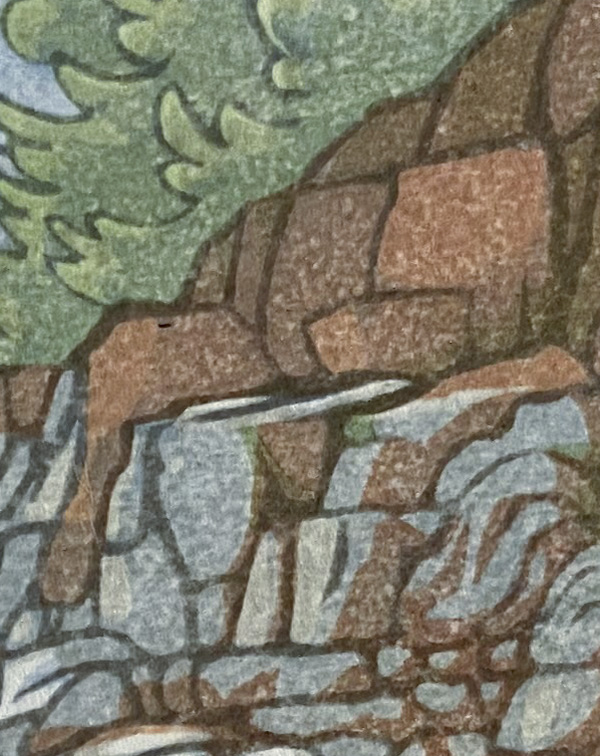
Looking back at my test prints, I see there are some registration problems with the green block. In the left image, there is green that sticks up too far, onto the top of a rock that should be mostly white. And on the right, there are some areas of green that extend past the border.
To address this, I used some micro-lumber (HO scale 2×4, I believe) I had laying around from a previous life as an architecture student. I tacked it in lightly with water-soluble glue, in case it didn’t work out.
Wellll, this did not work out so well. I don’t have a picture, but in the test after that, it was clear that not only was this change in the kento not enough to fix the problems, it introduced problems elsewhere — a margin of unprinted area just beneath many of the lines that delineate green areas like the trees.
So, the registration needed to be fixed with a knife. This was more successful!